Getting Ready
To run RAT successfully, it requires three different sets of credentials mentioned here. In this section, detailed and stepwise instructions are provided to get the credentials required for executing RAT 3.0.
AVISO Credentials
Follow the steps to set up AVISO account and its credentials which will be used to access and download JASON-3 altimetry data.
Step 1:
Click here to register for AVISO products.
Step 2:
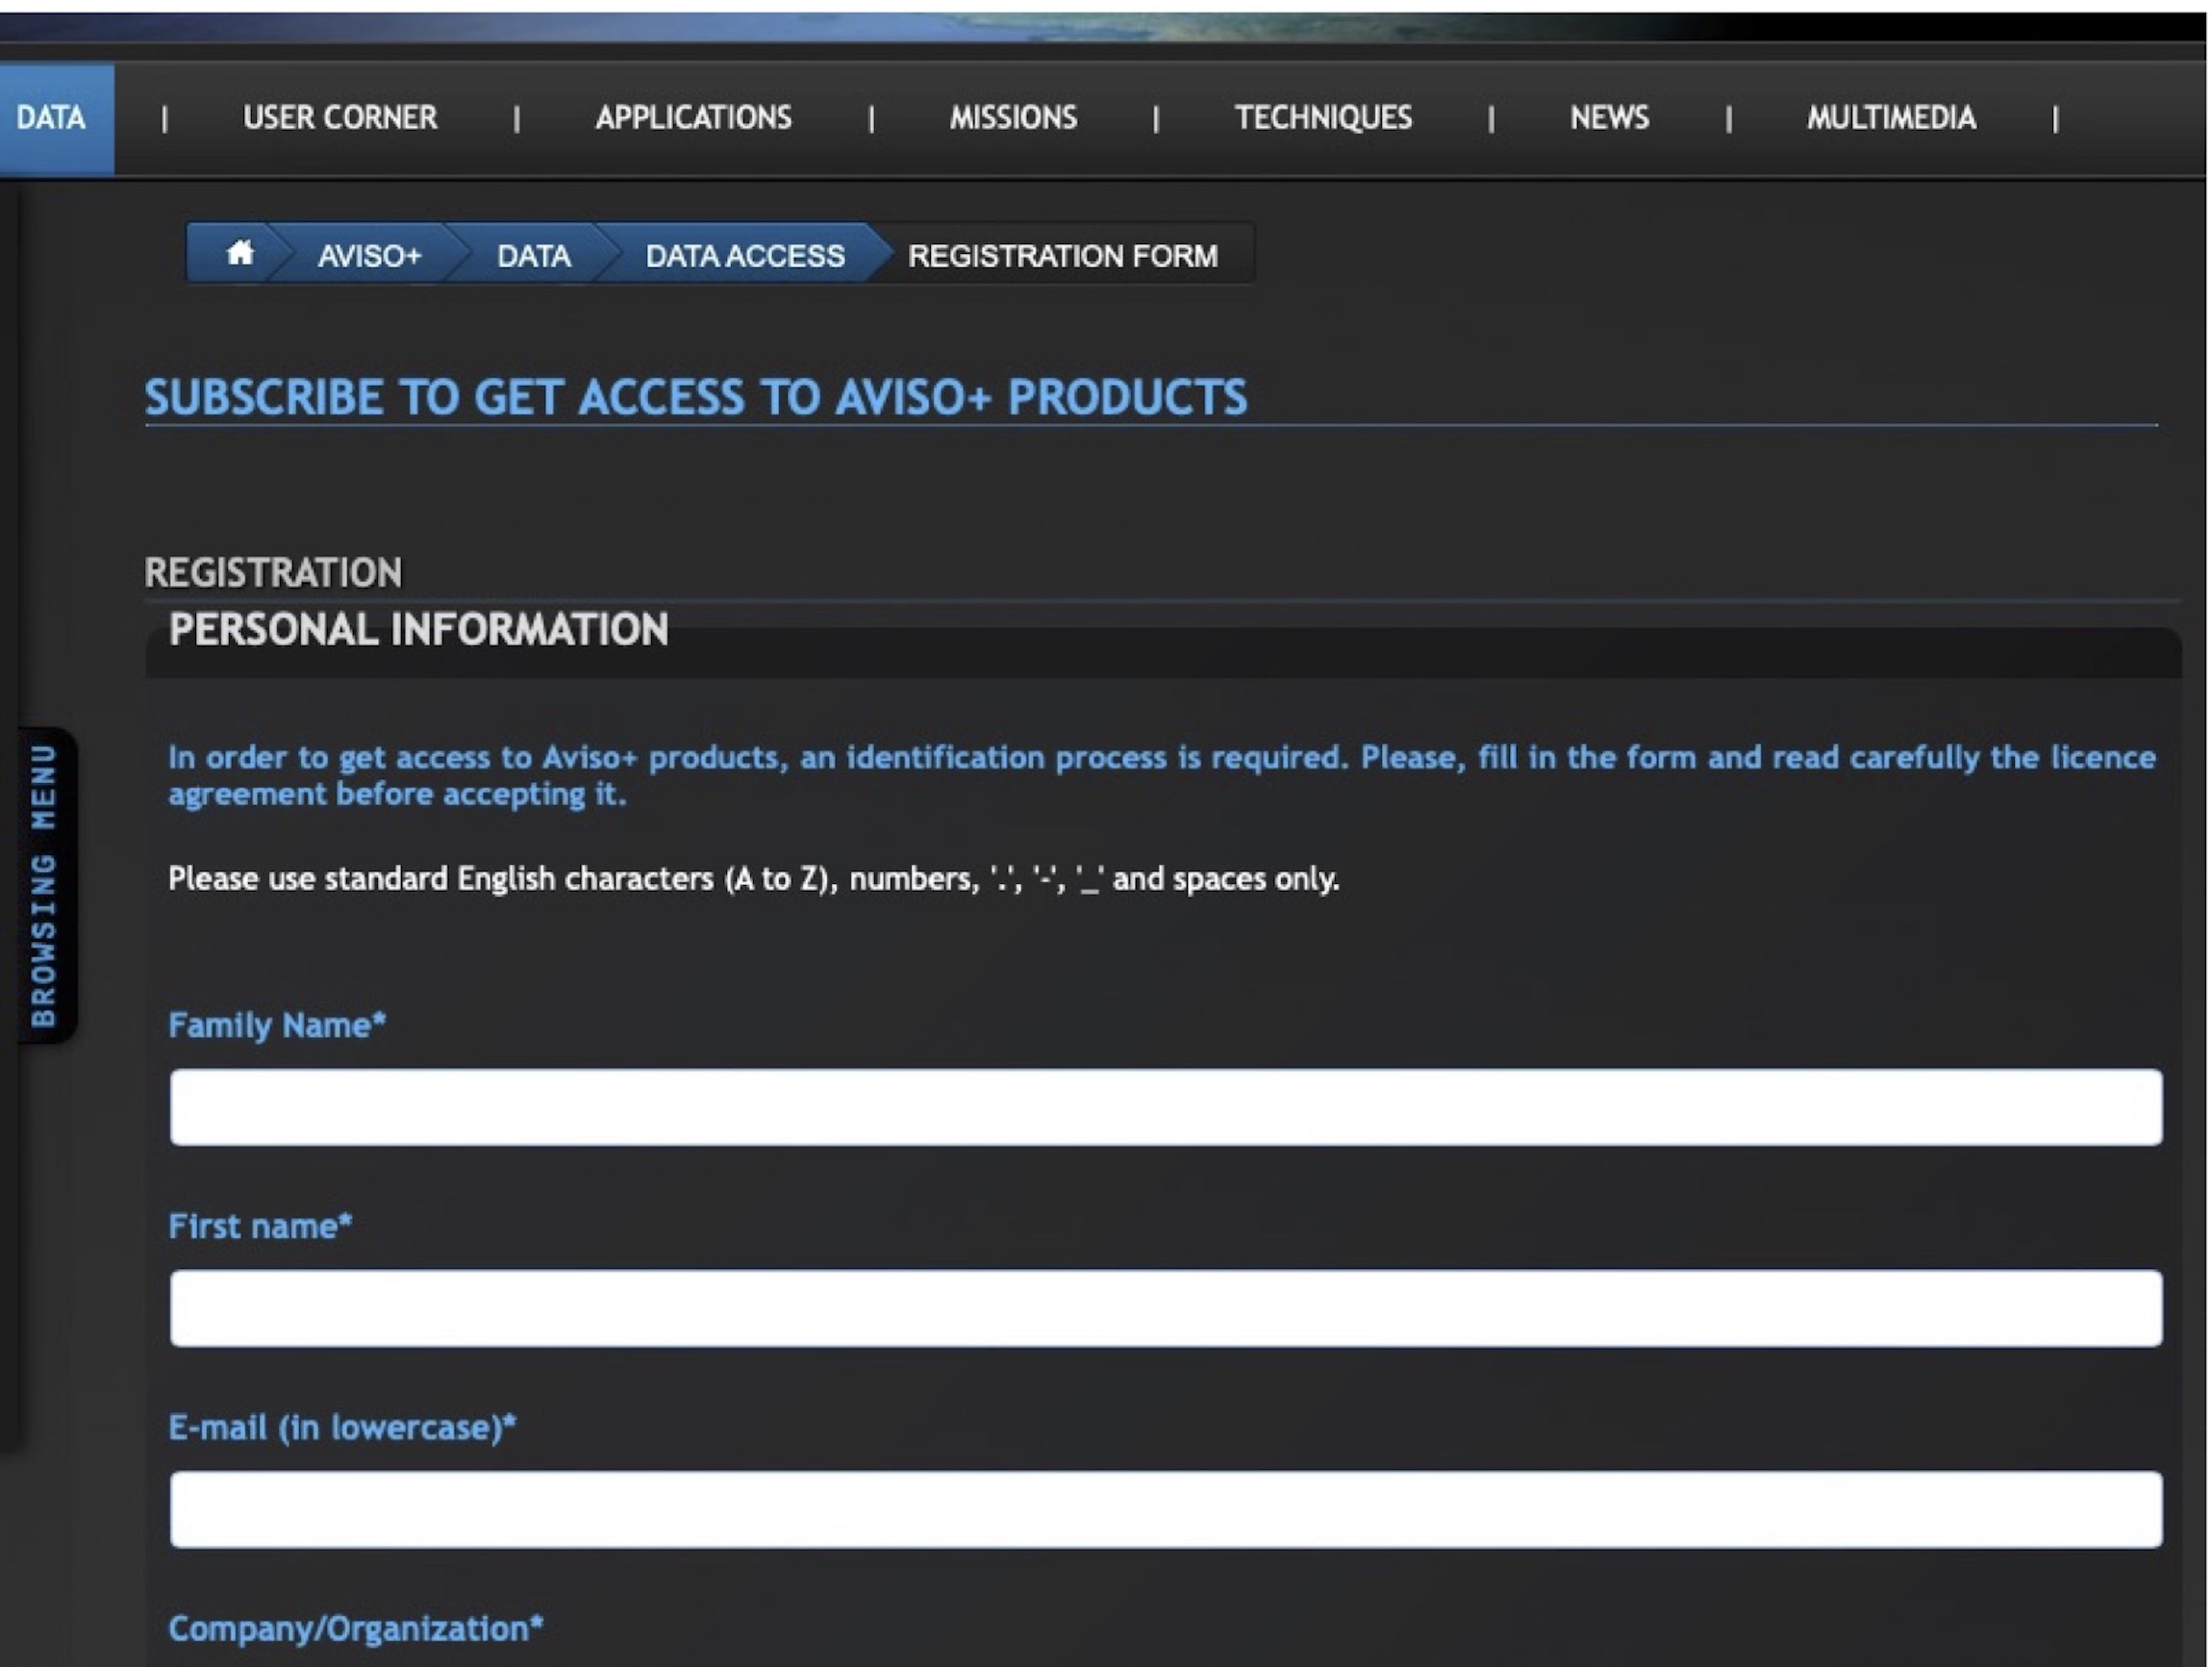
Fill out the registration form shown below.
Step 3:
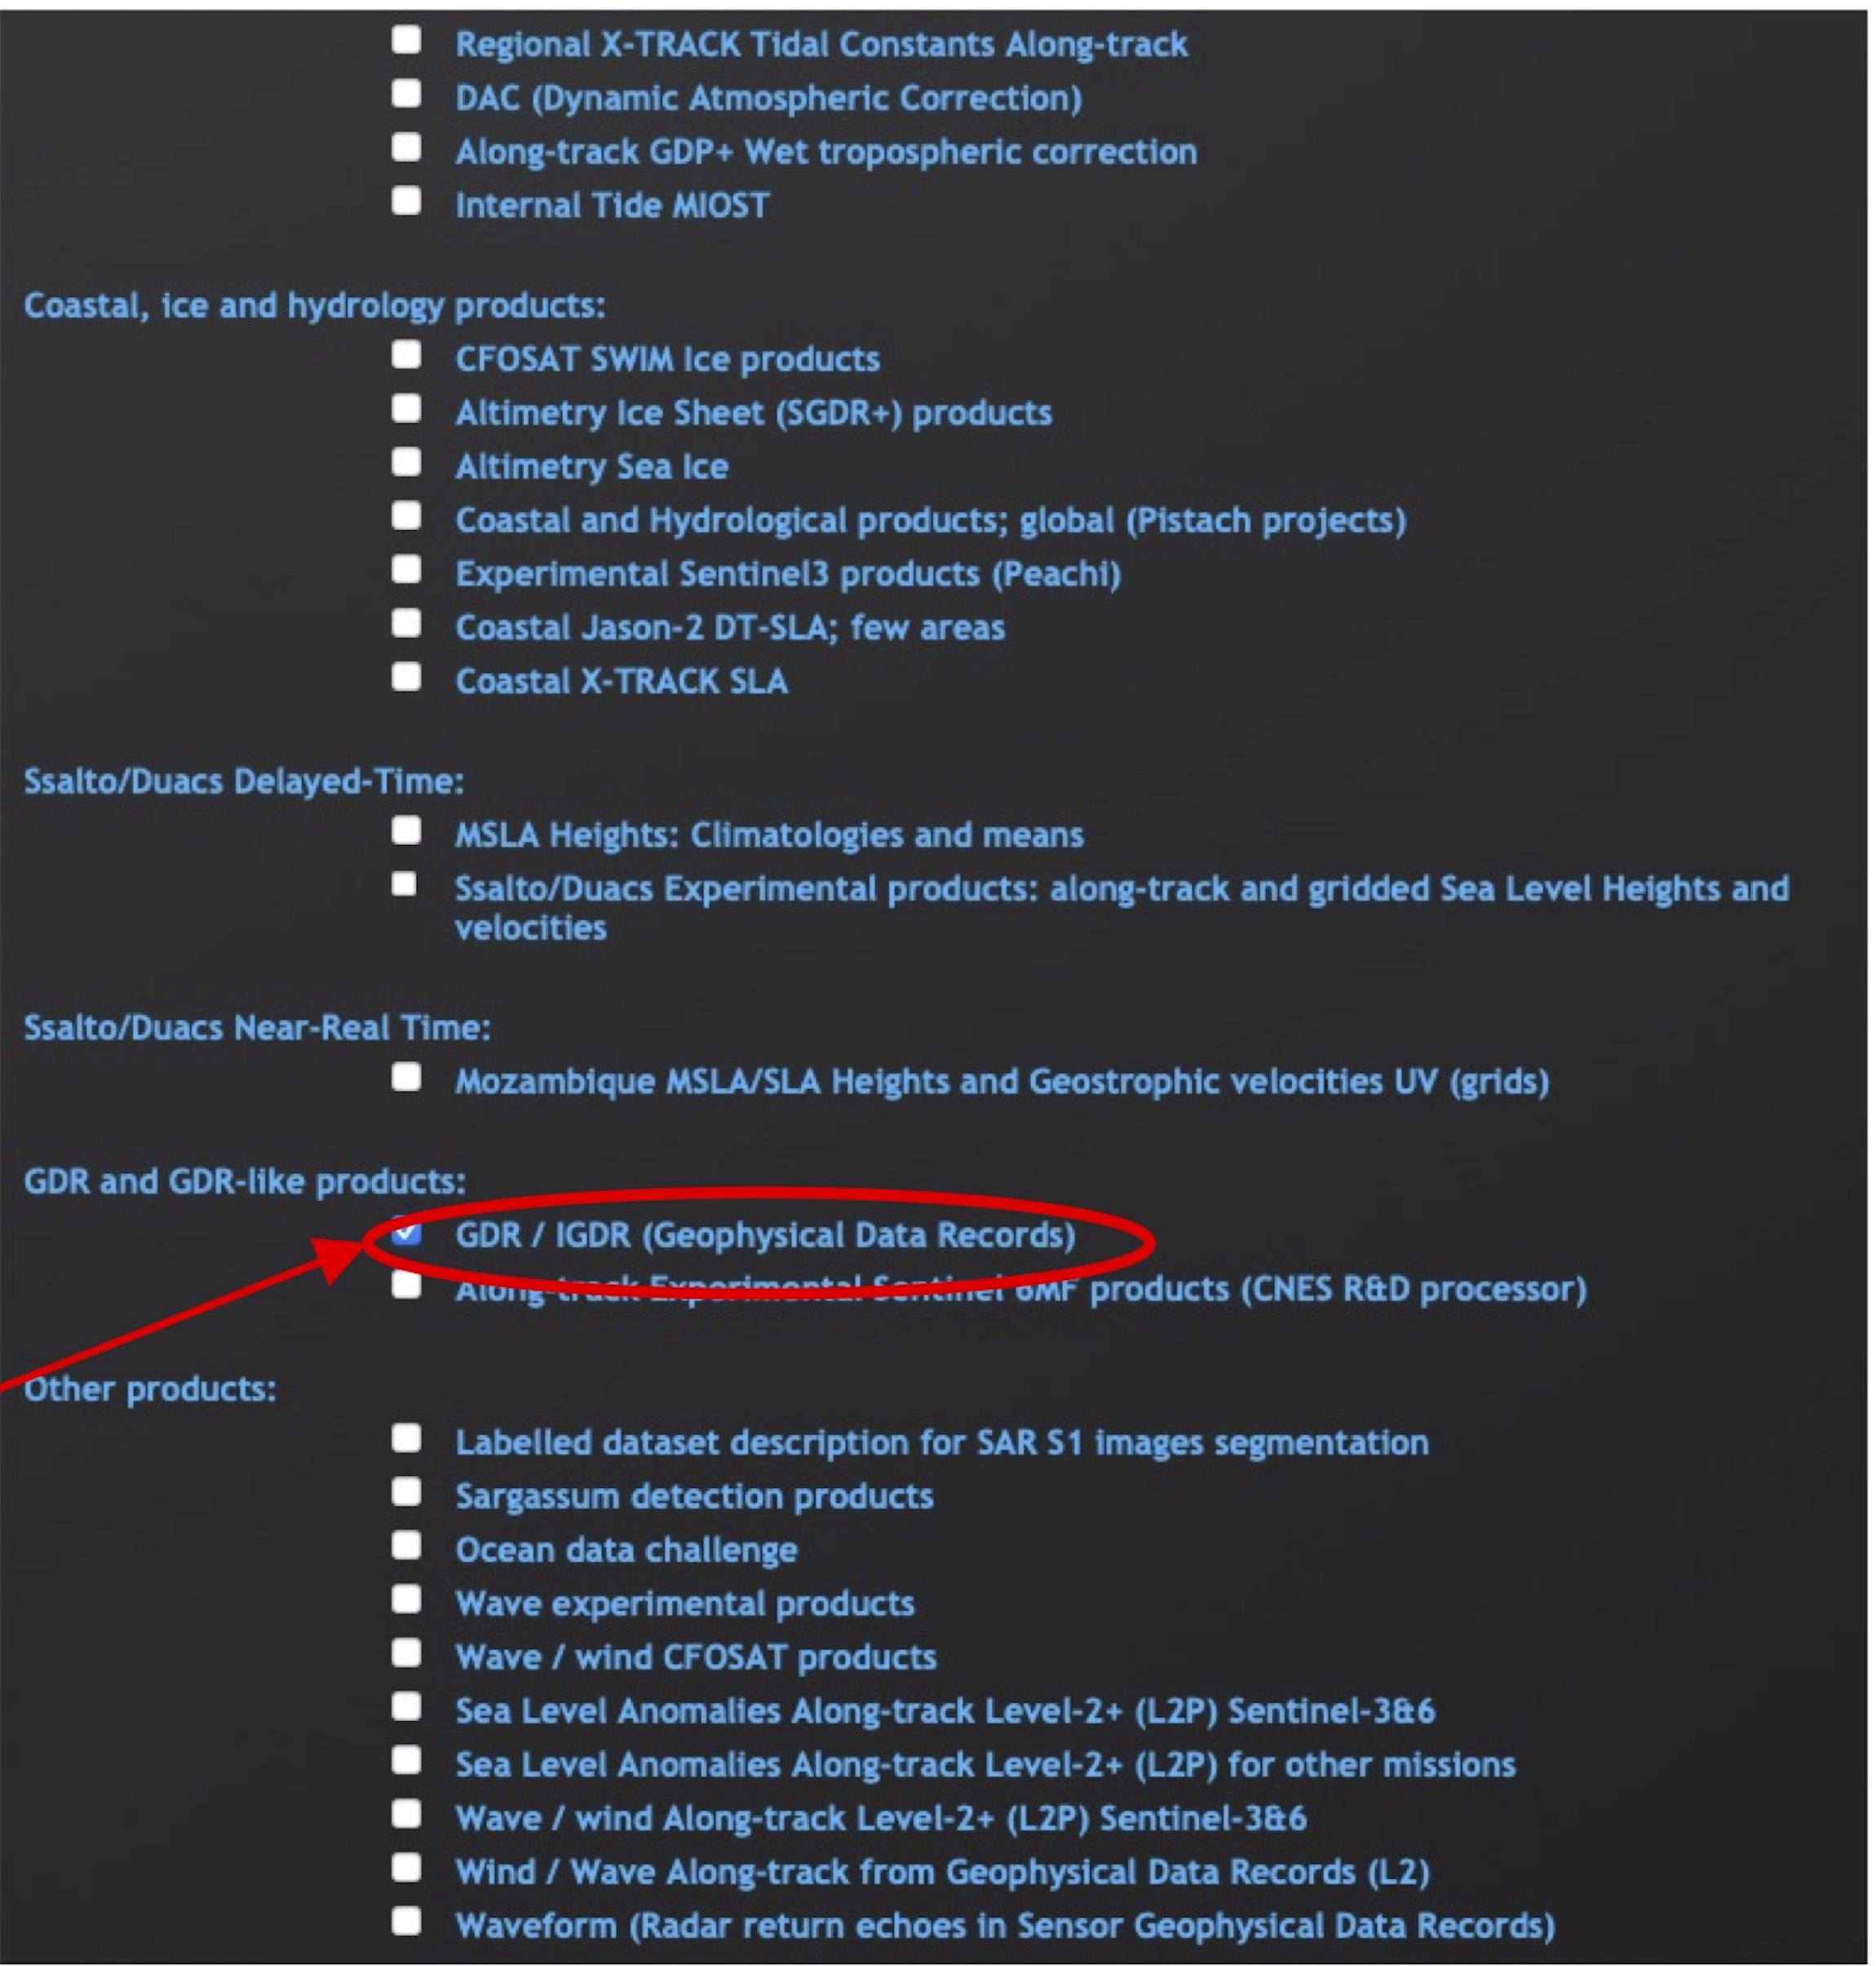
Select ‘GDR/IGDR (Geophysical Data Records)’ in the Product Selection section as highlighted in the screenshot below.
Step 4:
Accept the terms and conditions.
Step 5:
Submit the form.
IMERG Credentials
Follow the steps to set up IMERG account and its credentials which will be used to access and download IMERG Late Precipitation product.
Step 1:
Click here to register for IMERG products.
Step 2:
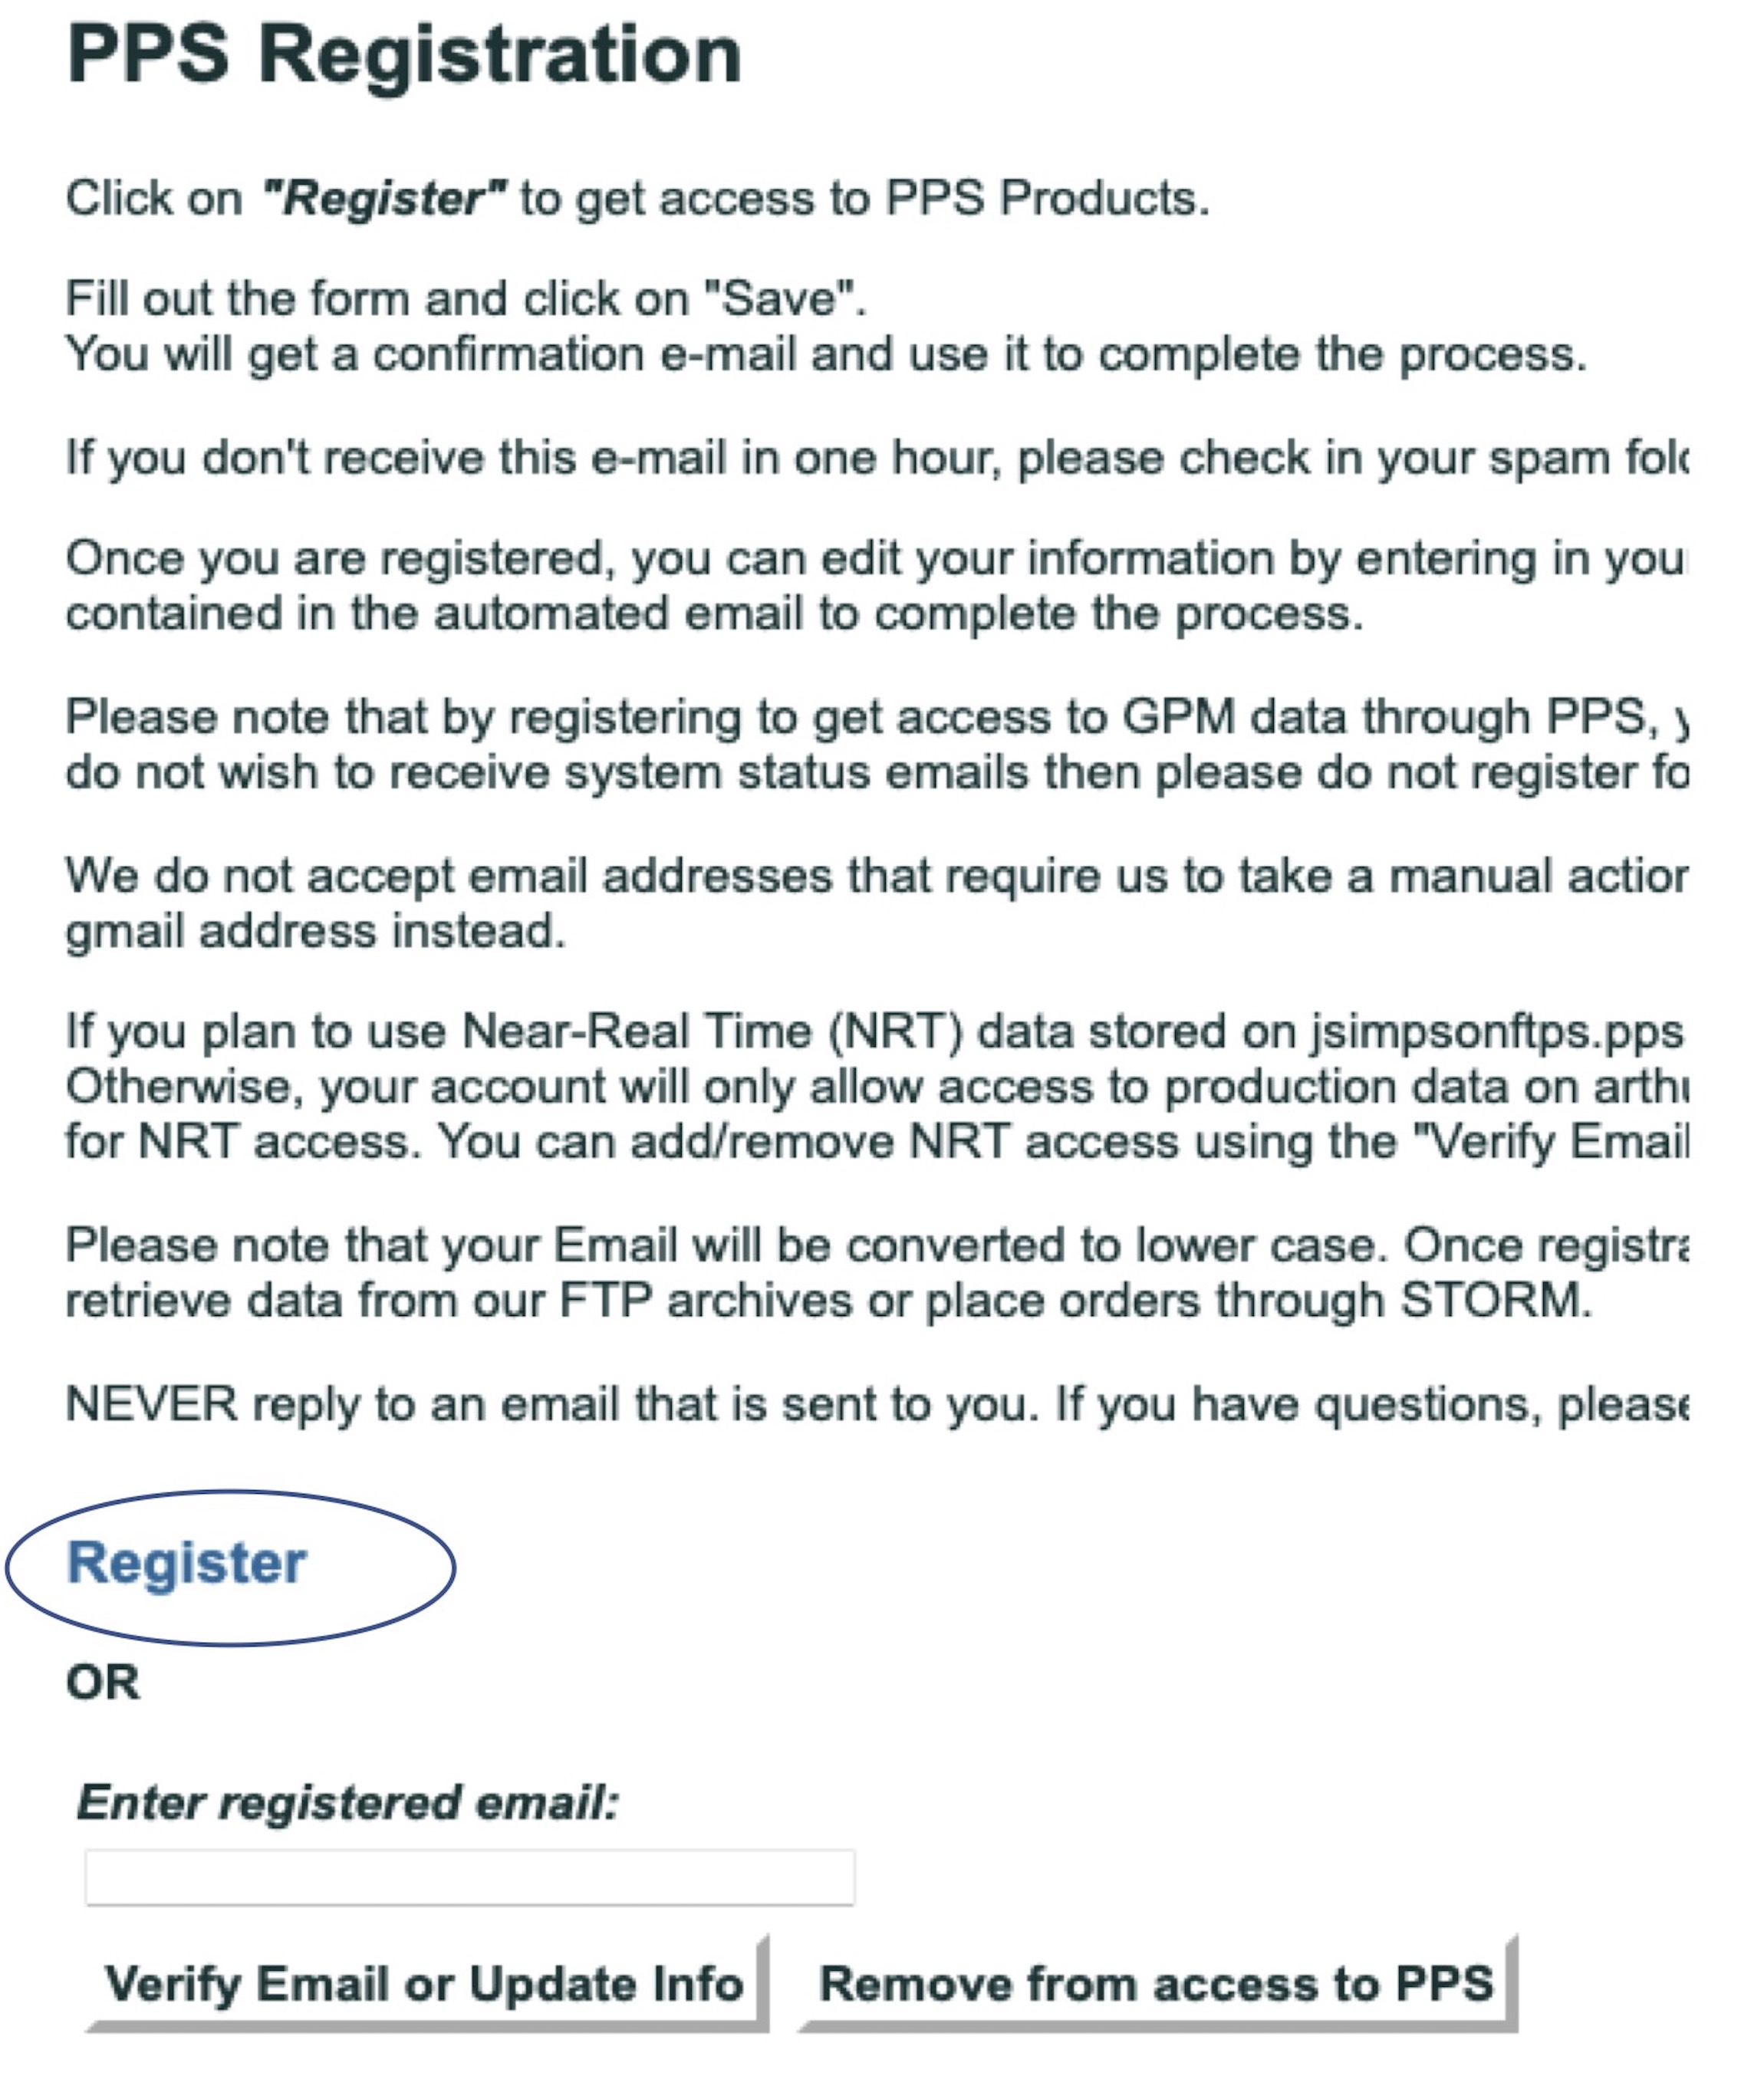
Click on Register (circled in the screenshot below) to open the registration form.
Step 3:
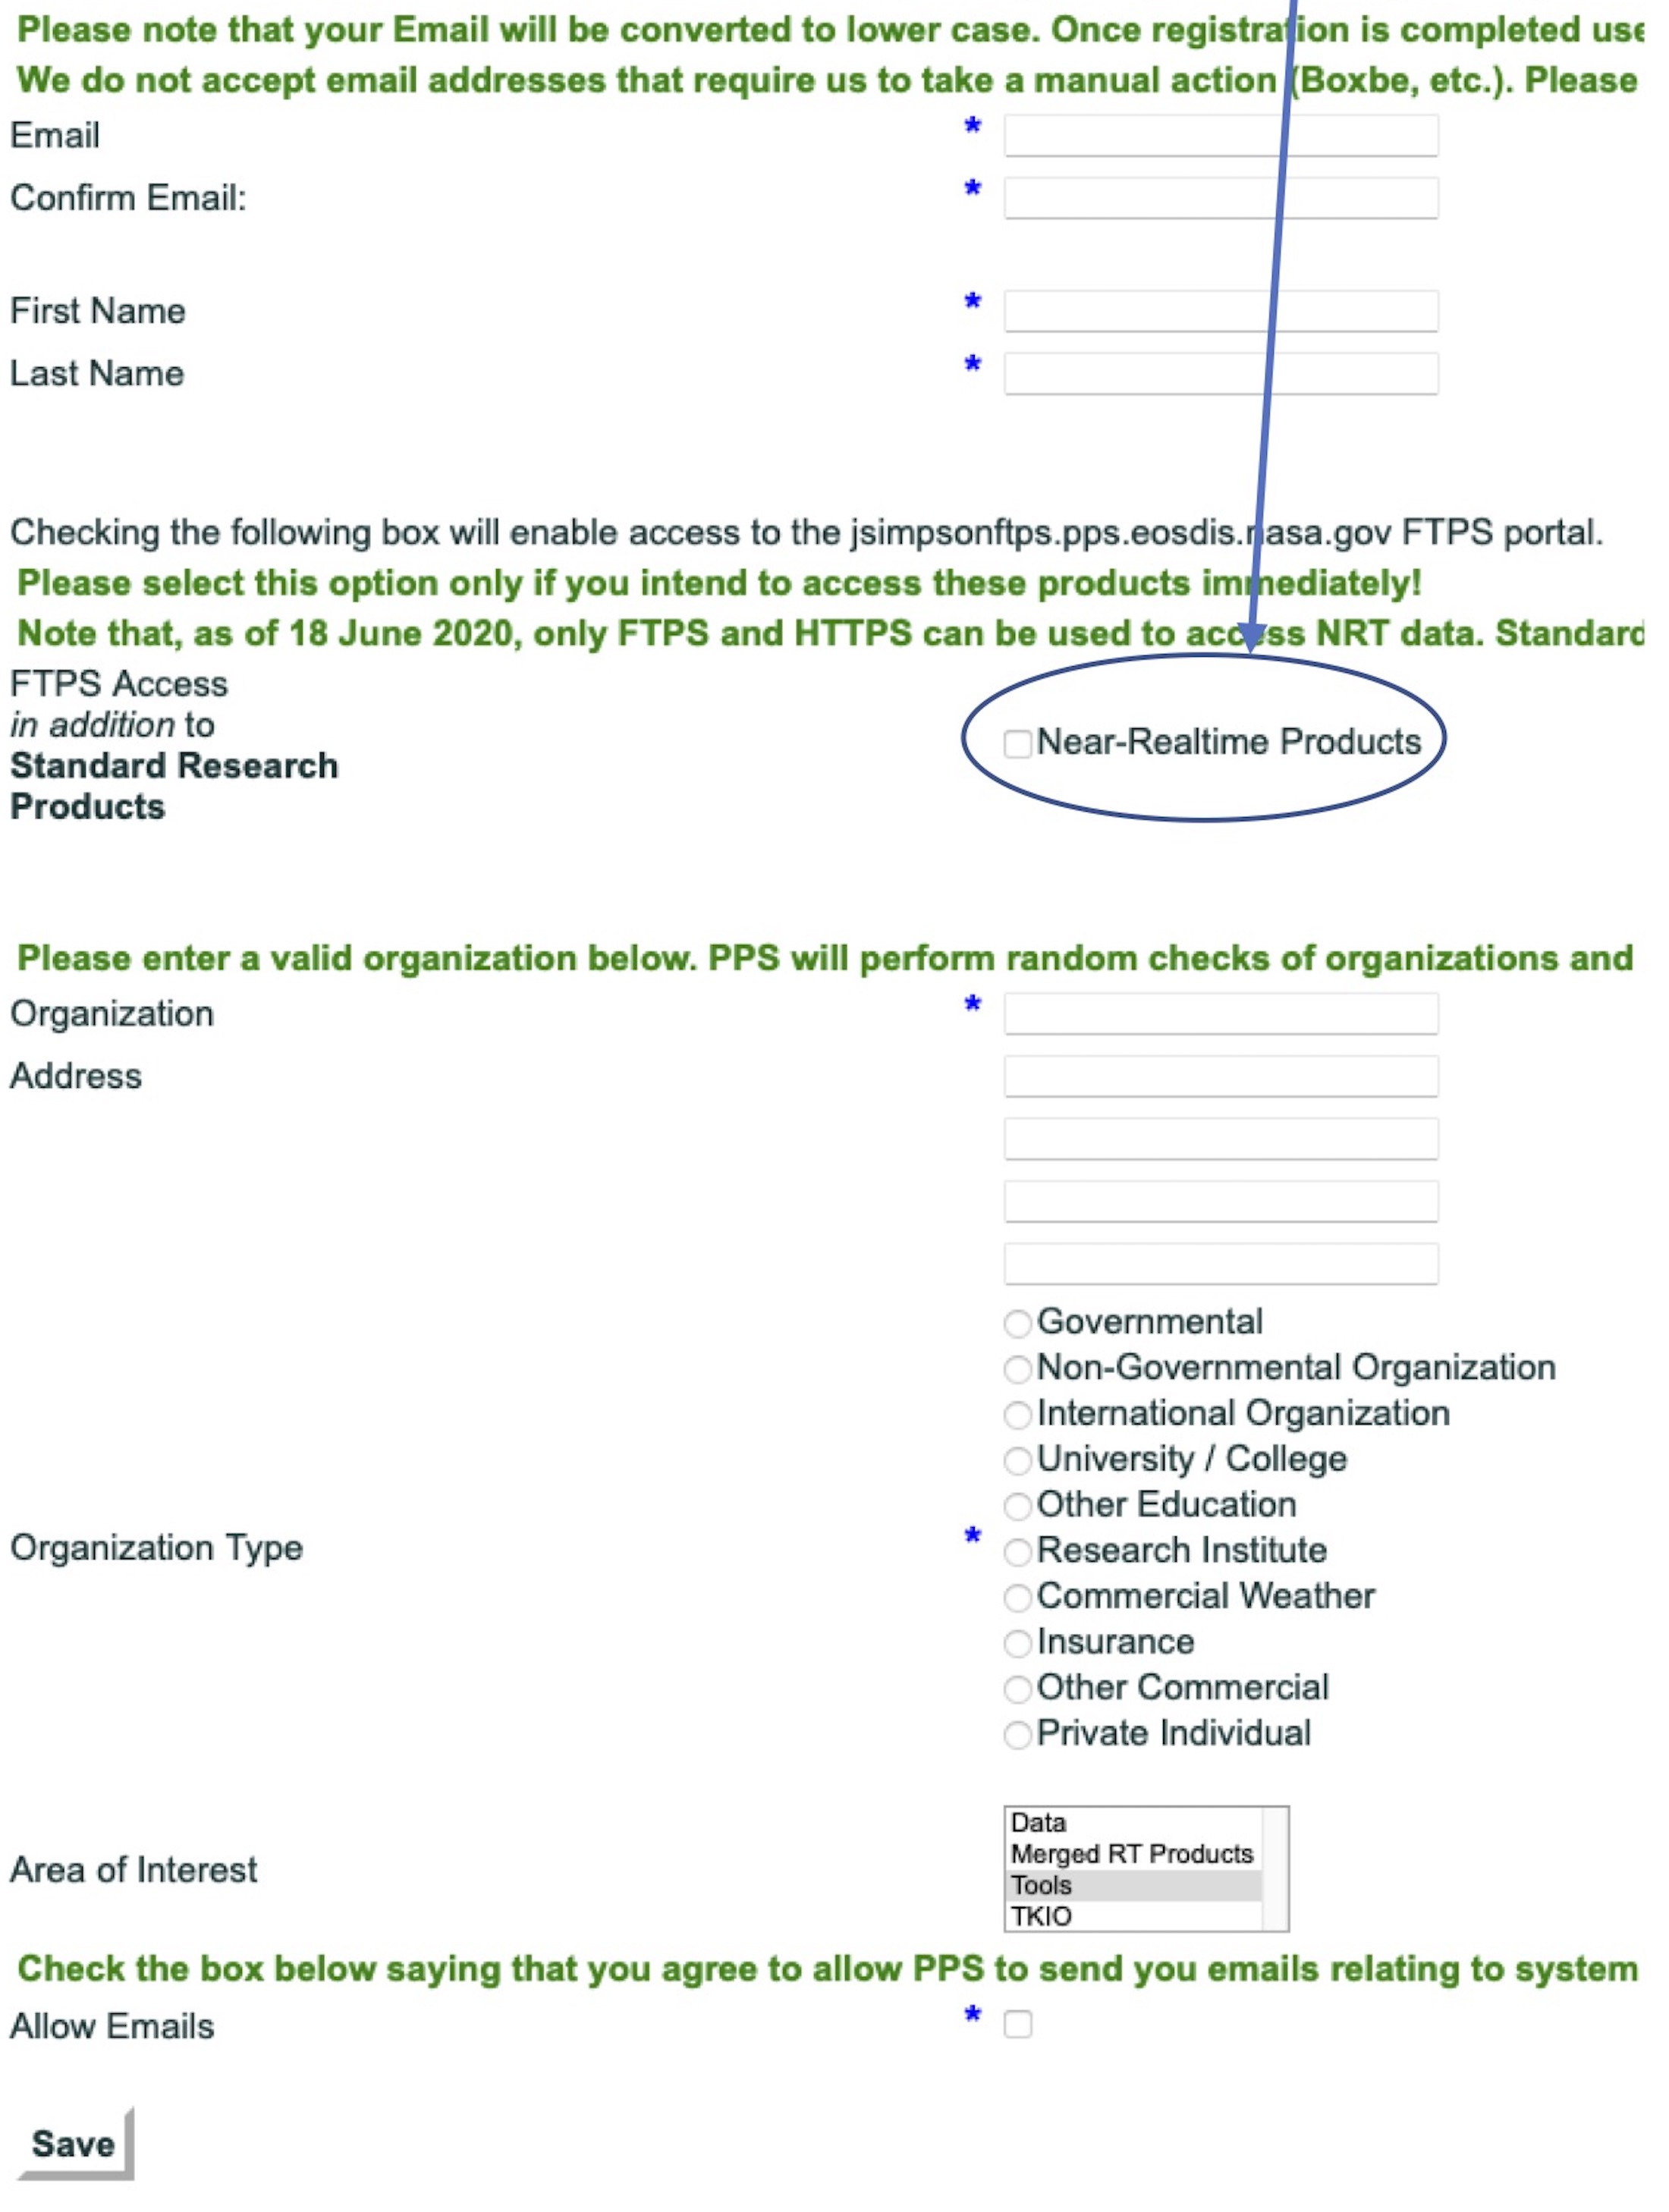
Fill out the registration form shown below. Please make sure to check 'Near-Realtime Products' (circled in the screenshot below).
Step 4:
Click on Save. You will get a confirmation email and use that to complete the process.
GEE Credentials
RAT requires google service account, which is associated with a cloud project and both the project and service account should have access to earth engine api. It is free to create with a google user account (gmail account). Complete the listed tasks by following the instructions to set up a GEE service account.
Task 1 : Create a google cloud project
Step 1:
Click here to create a google cloud project.
Step 2:
Click on 'Create a Cloud project'.
 Step 3:
Enter a Project name and Click on ’CREATE’.
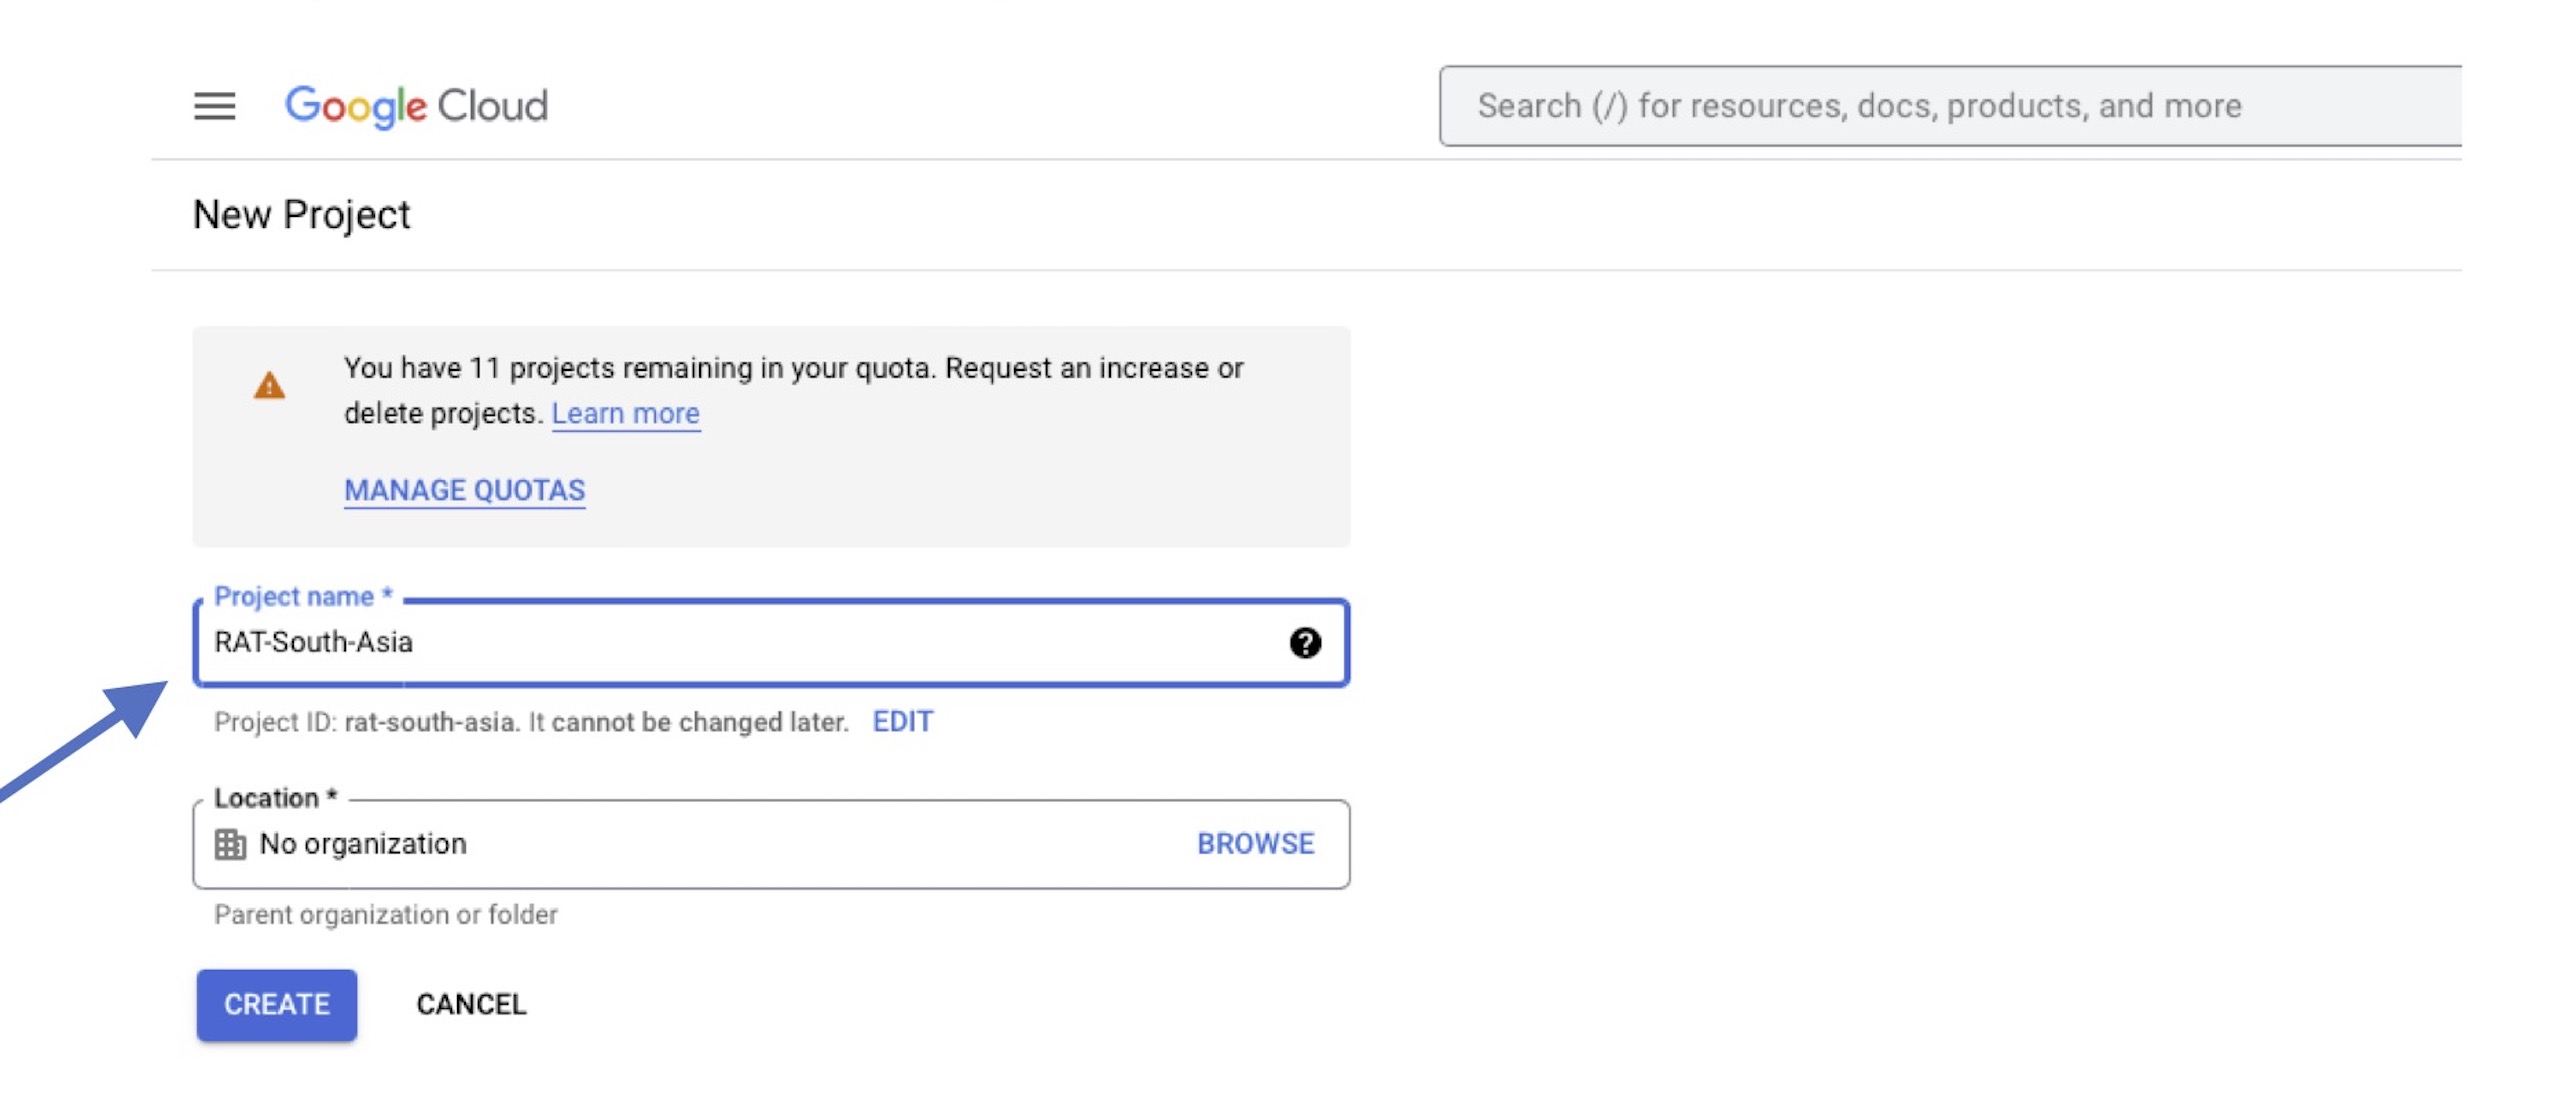
Tip
Project name can be something like ‘RAT-SE-Asia’ or ‘RAT Mekong’.
Note
Please do not close the cloud project window which will open up as it will be used to continue Task-3.
Task 2 : Enable Earth Engine API for the cloud project created.
Step 1:
Click here to enable earth engine API.
Step 2:
Click on 'Enable the Earth Engine API’.
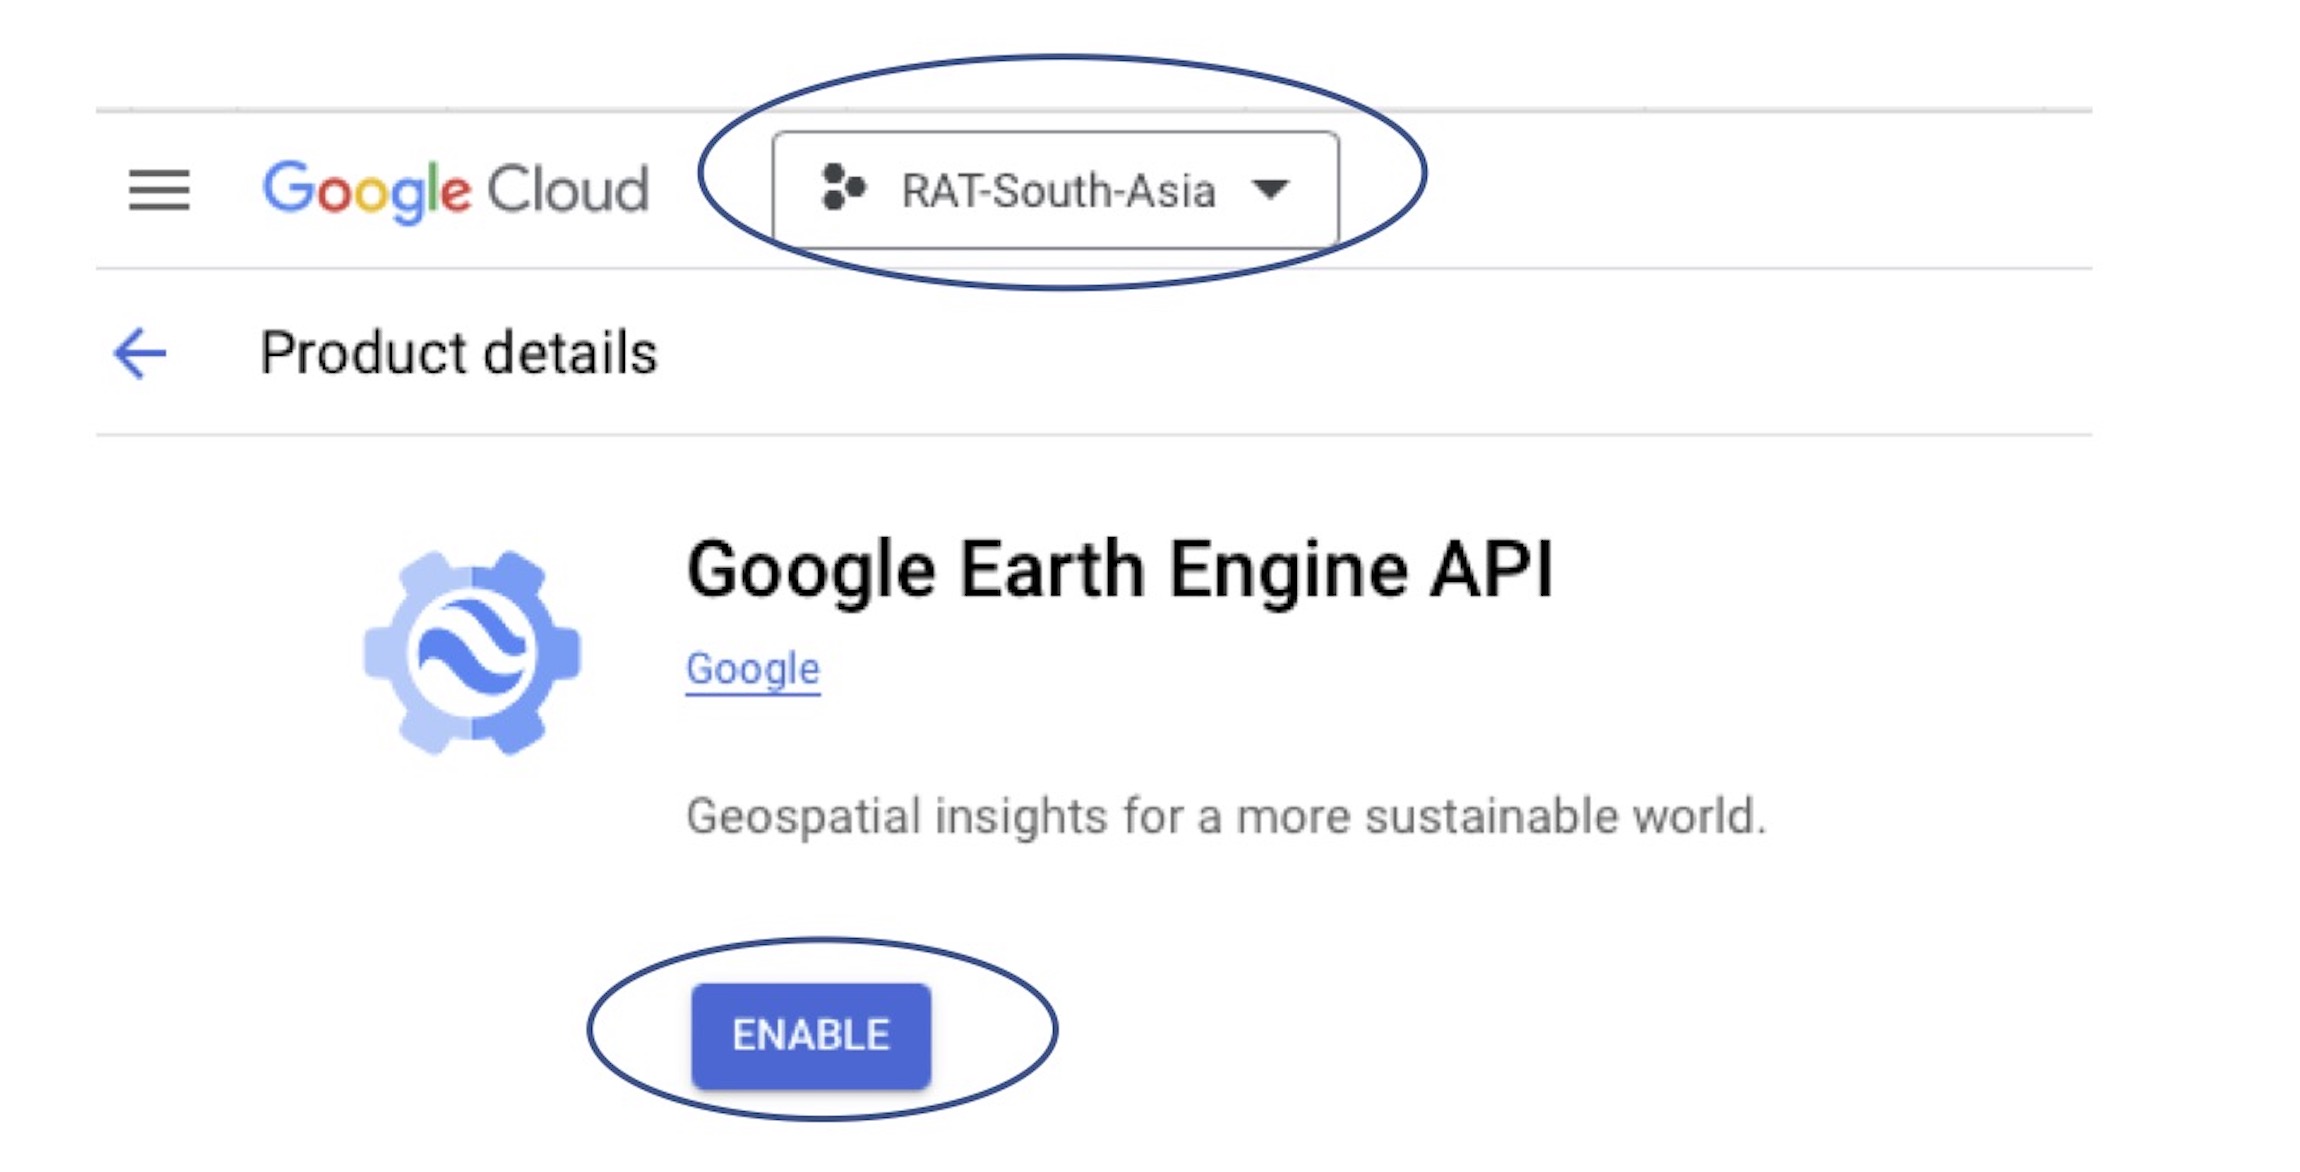
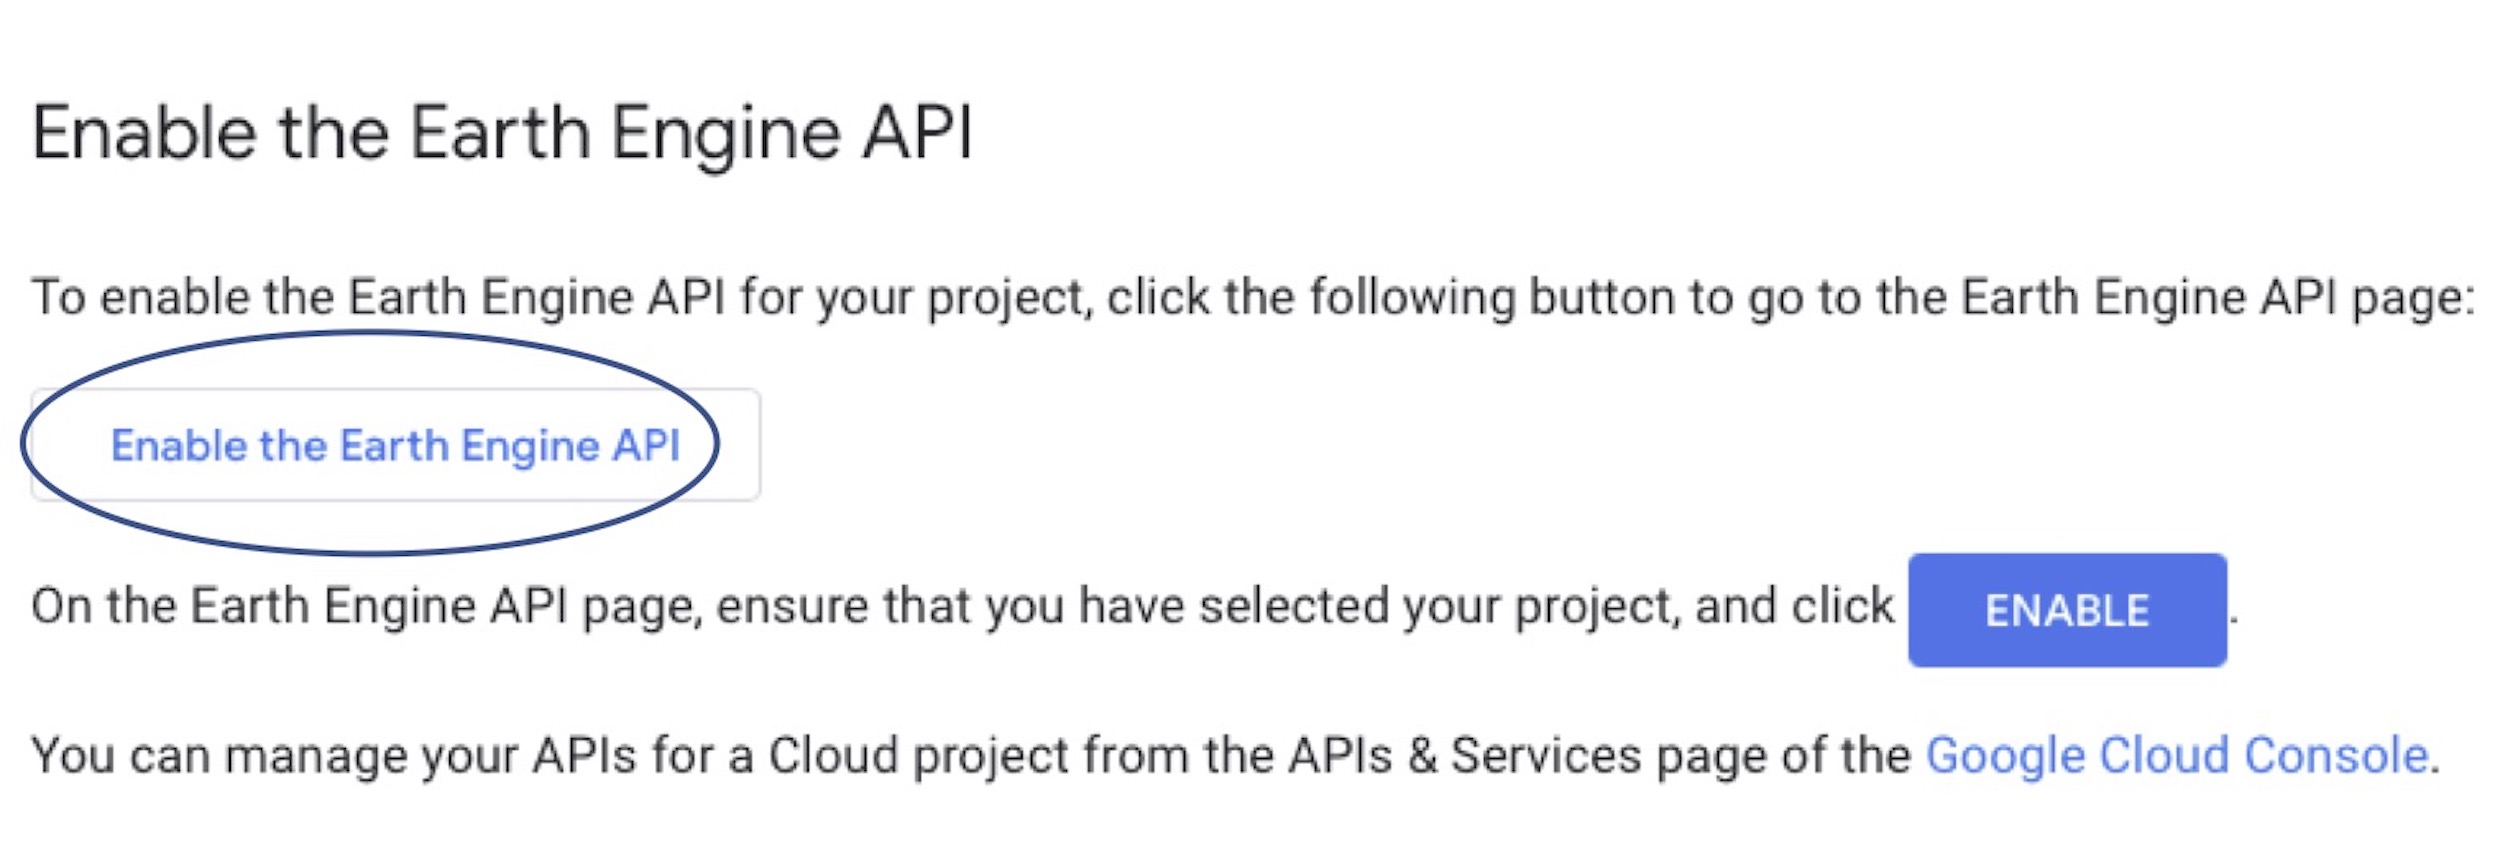 Step 3:
Make sure the right project is selected and Click on ’ENABLE’.
Task 3 : Create a service account.
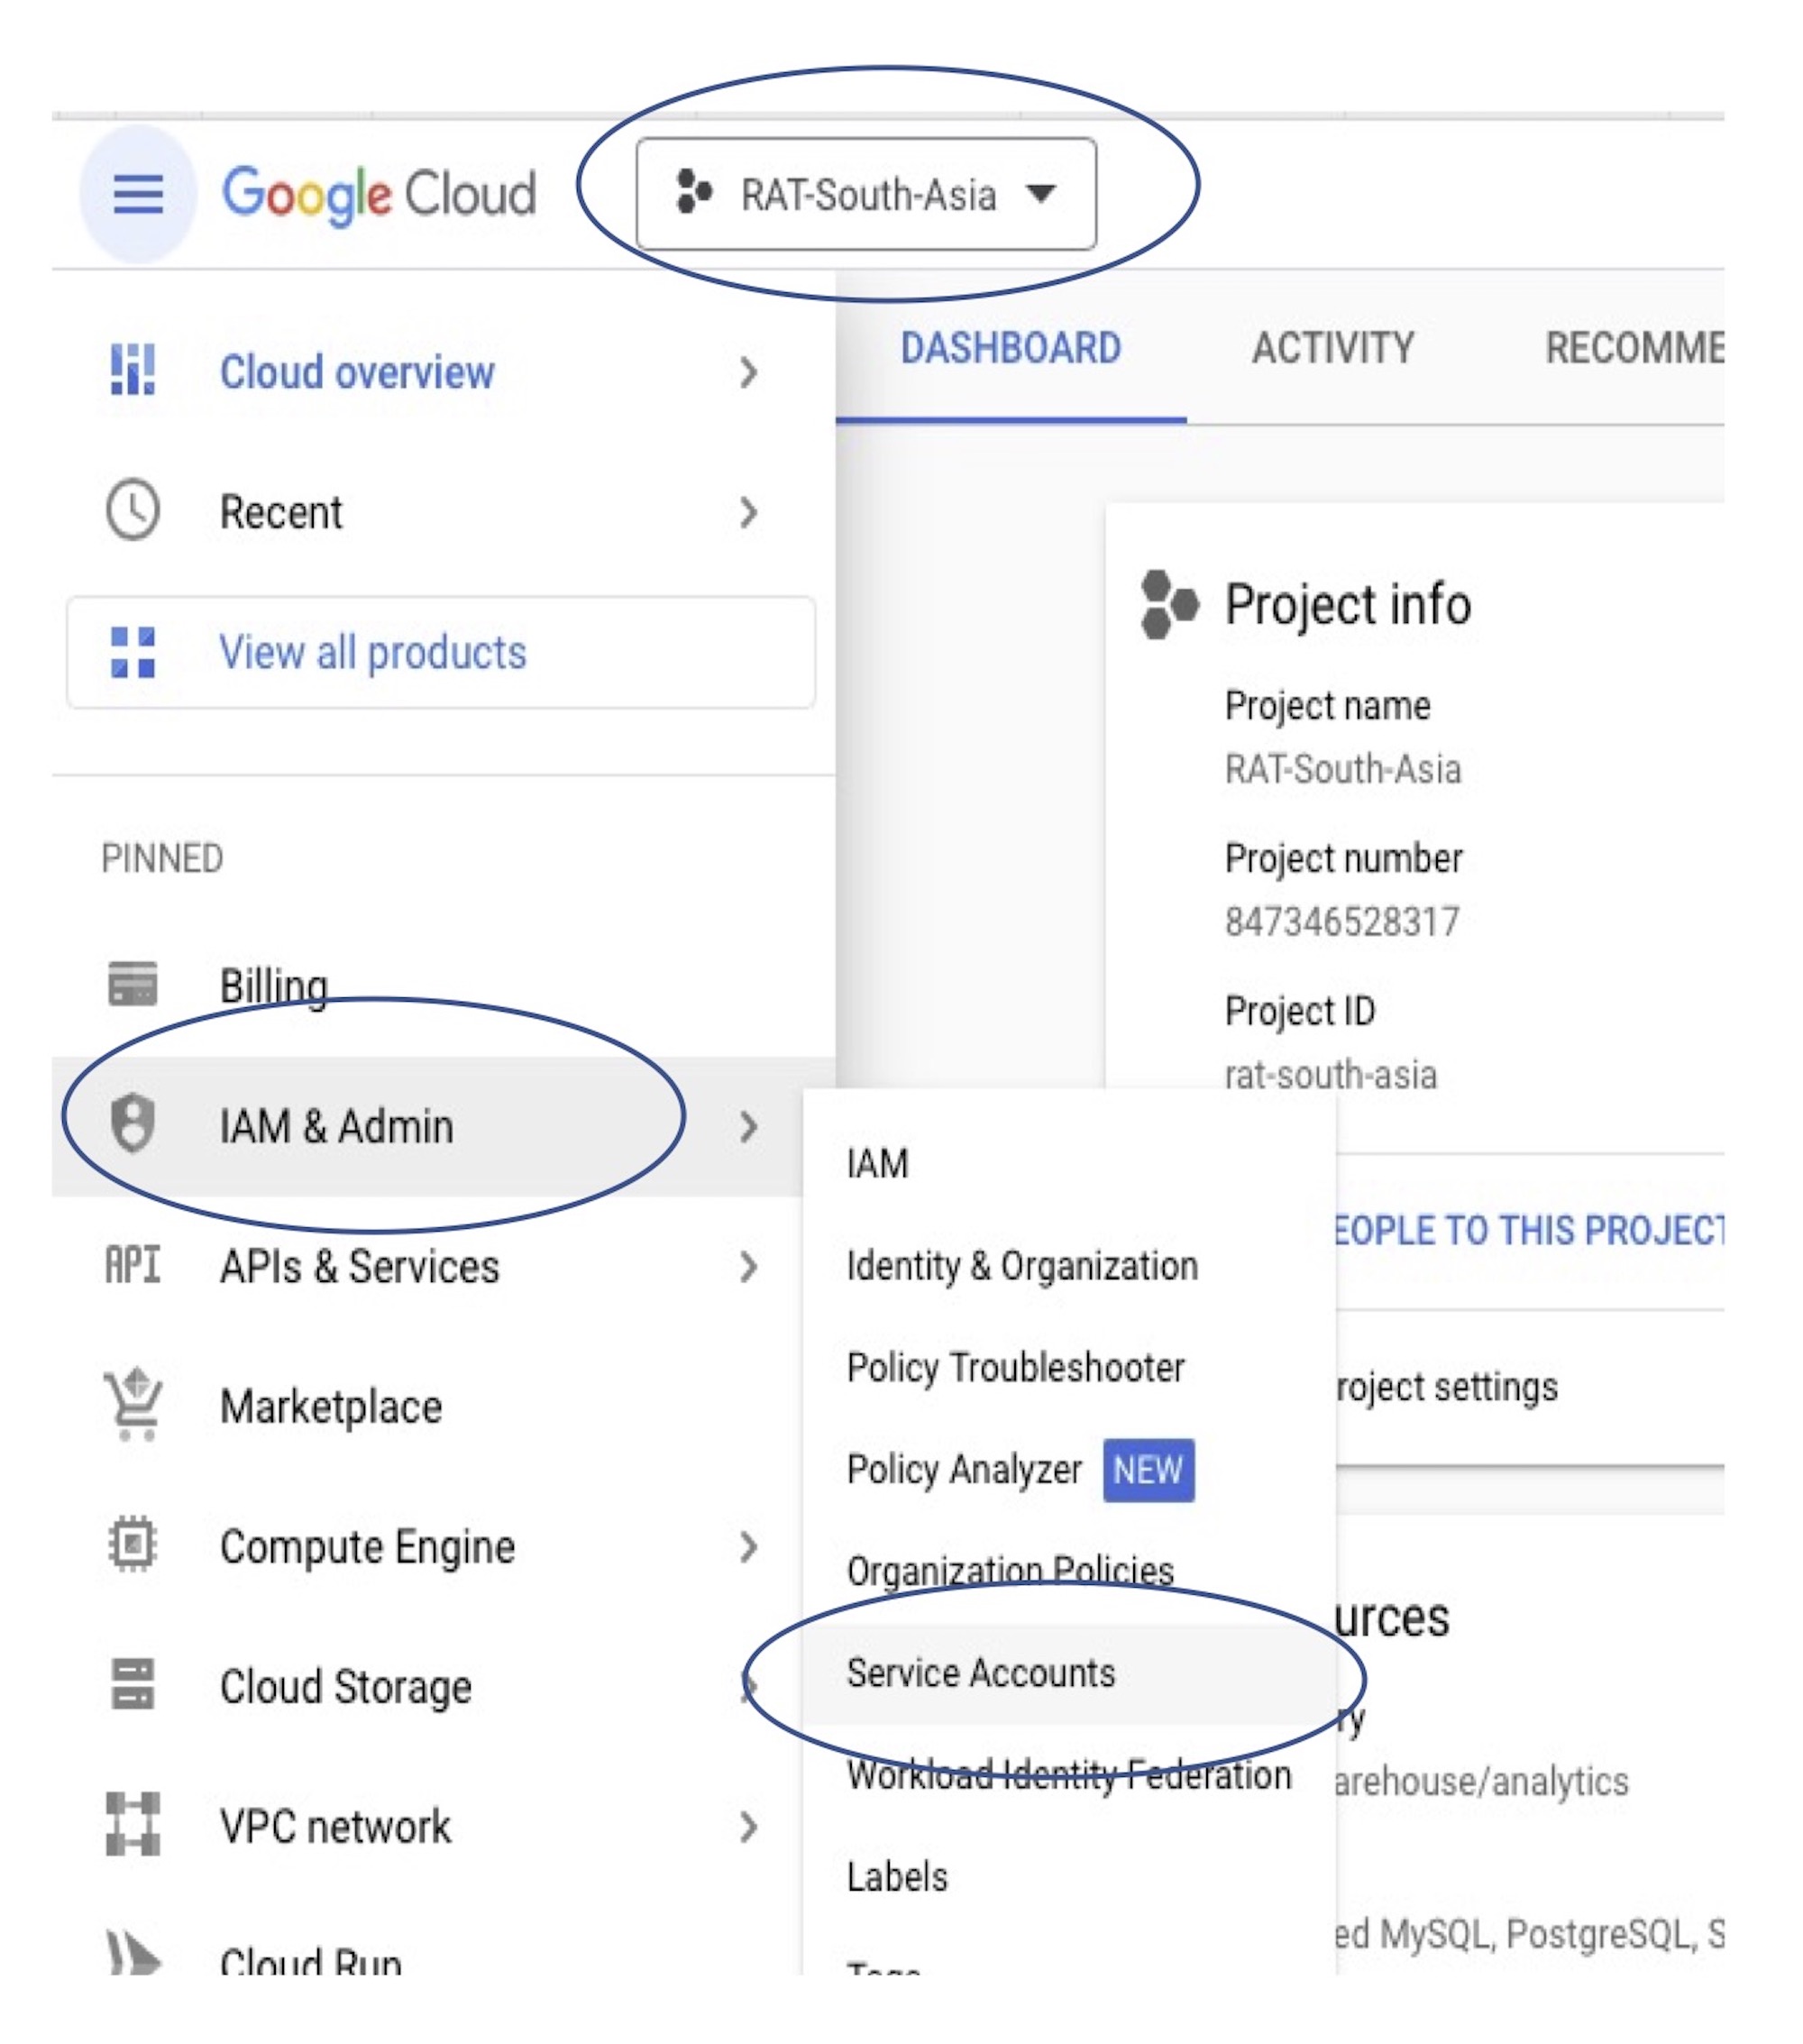
Step 1:
In the cloud project window opened up after completing task 1, make sure the right project is selected and Click on ‘IAM & Admin’ > ‘Service Accounts’.
 Step 2:
Click on ‘CREATE SERVICE ACCOUNT’.
 Step 3:
Enter 'Service account name' and Click on ‘CREATE AND CONTINUE’.
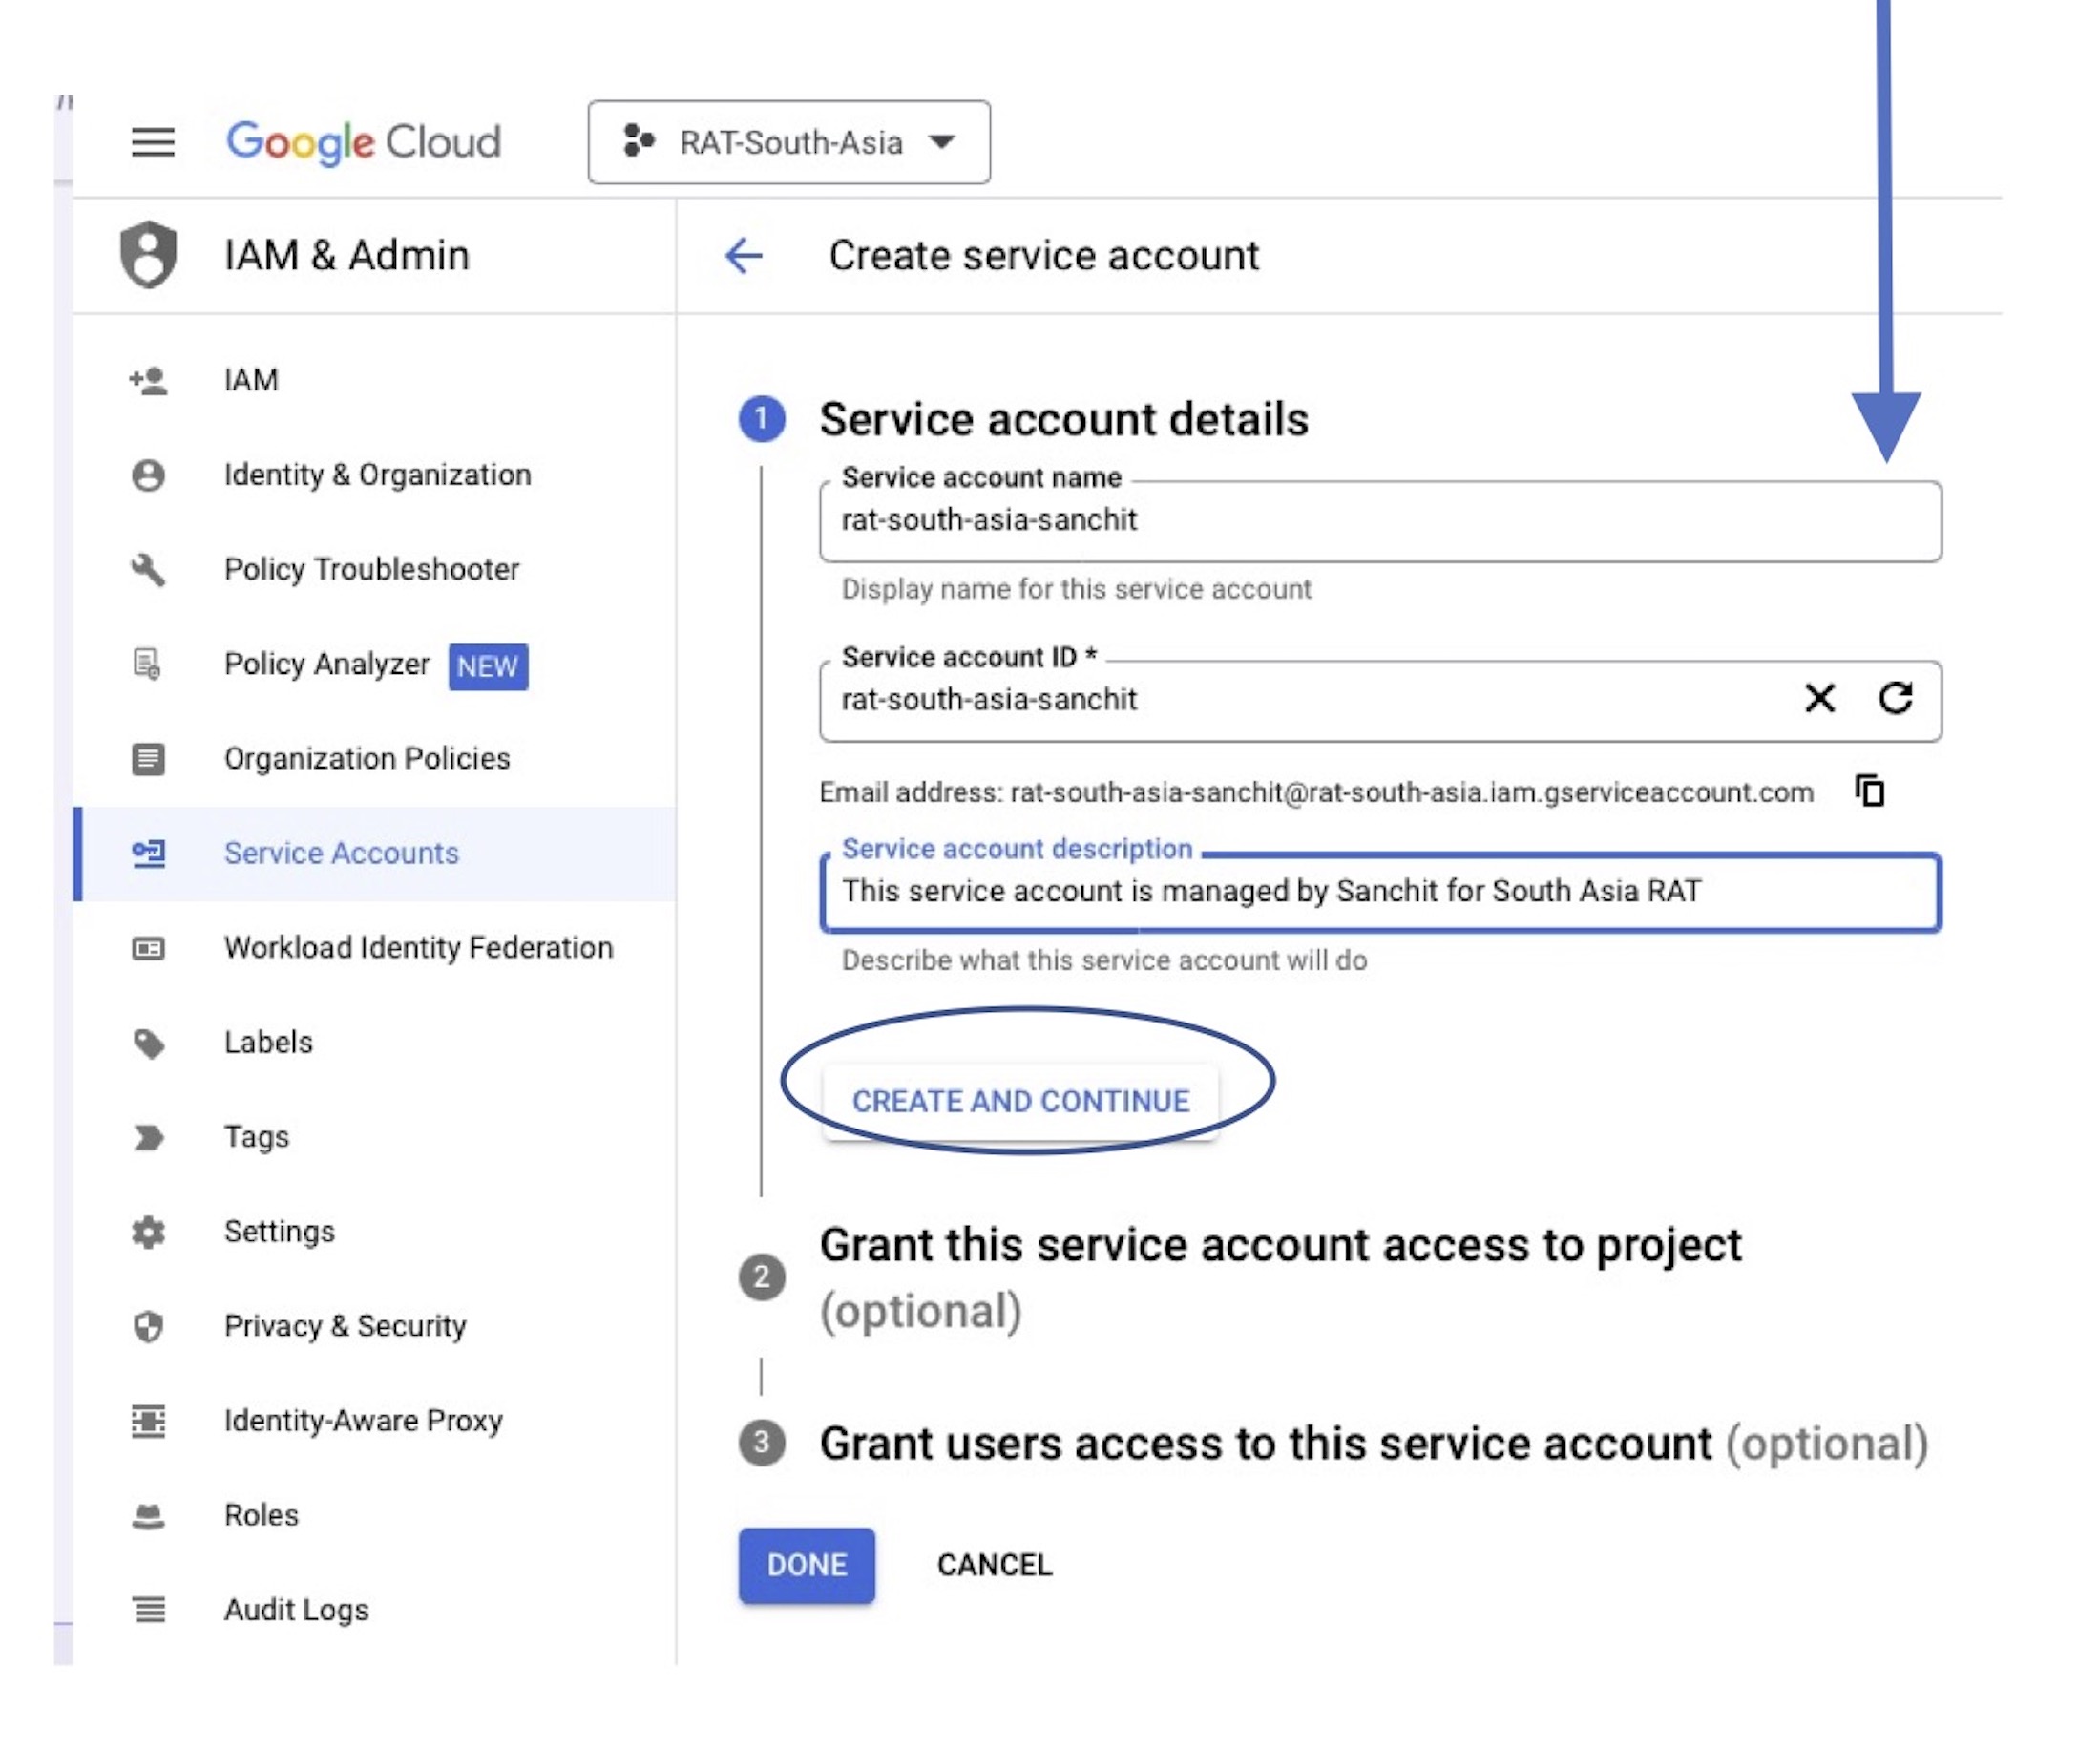
Tip
- Service account name can be something like ‘rat-Mekong-YOUR_NAME’.
- Description can be about who will be using this service account and for what.
Step 4:
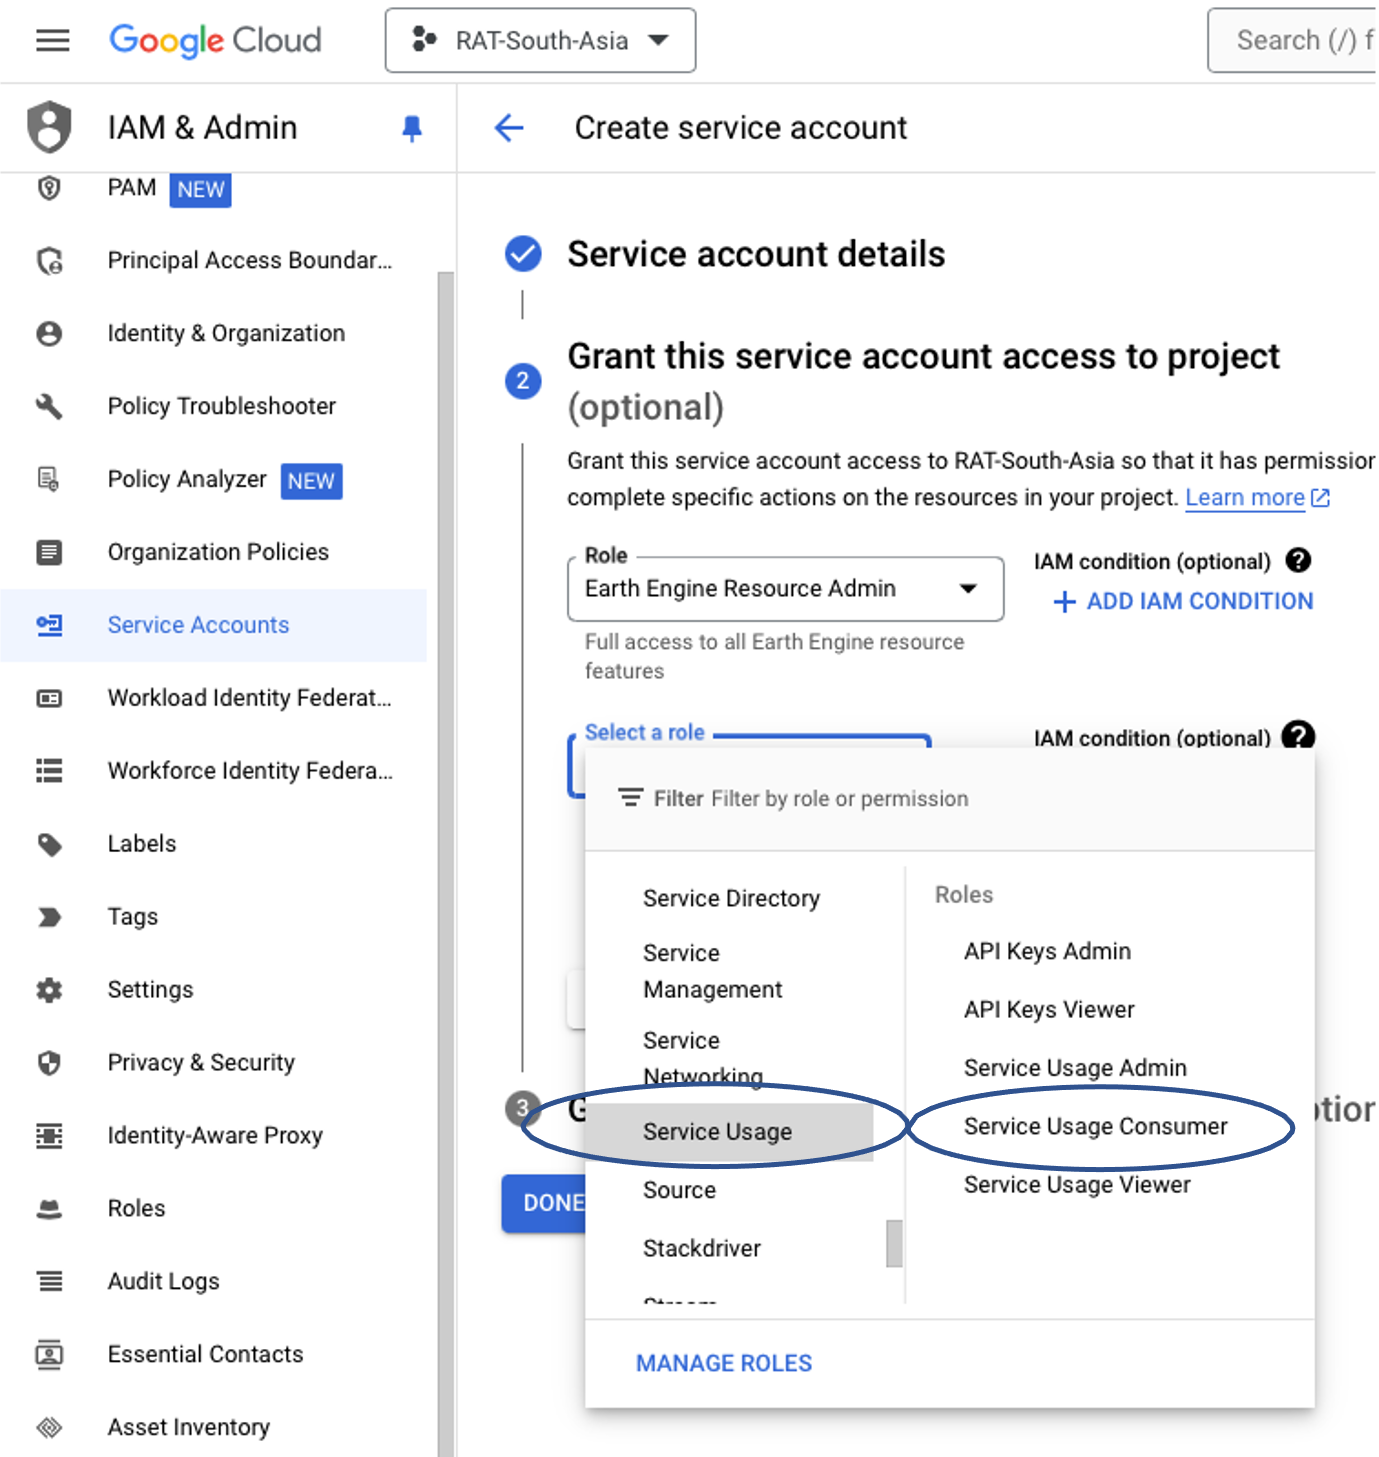
Choose ‘Earth Engine’ > ‘Earth Engine Resource Admin’ for first role and choose ‘Service Usage’ > ‘Service Usage Consumer’ as another role.After selecting both roles, click on ‘CONTINUE’. And then click on ‘Done’.

 Step 5:
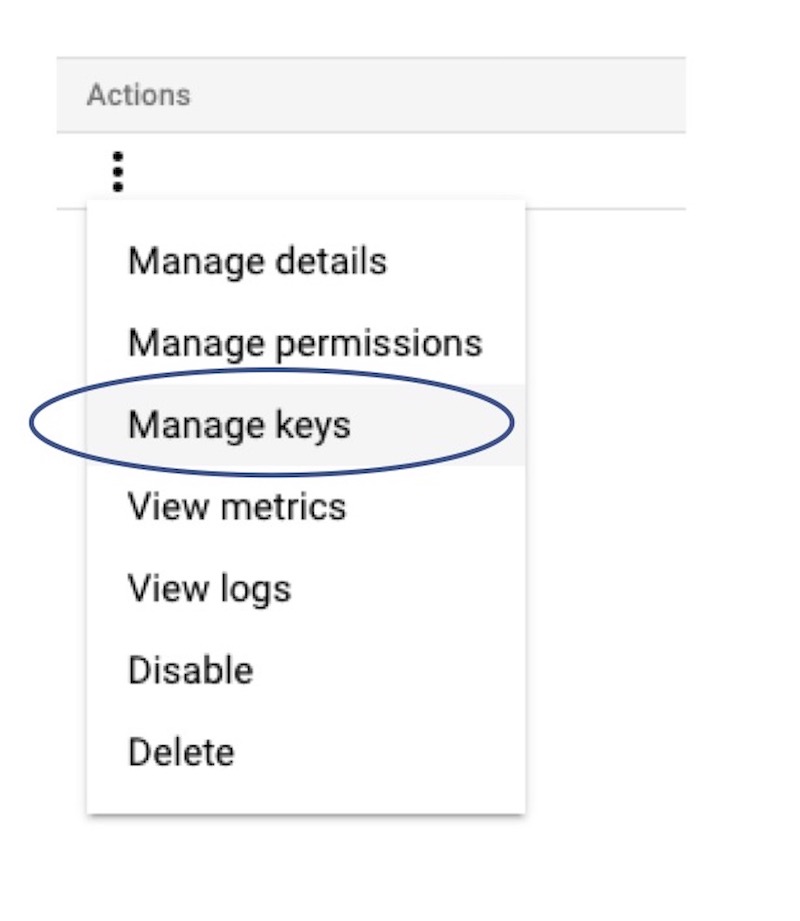
Click on ‘Actions’ > ‘Manage Keys’ for the service account you created.
 Step 6:
Click on ‘Add KEY’ > ‘Create new key’ and select json.

Task 4A (Recommended, in place of Task 4B) : Register the google cloud project to use Earth Engine.
Step 1:
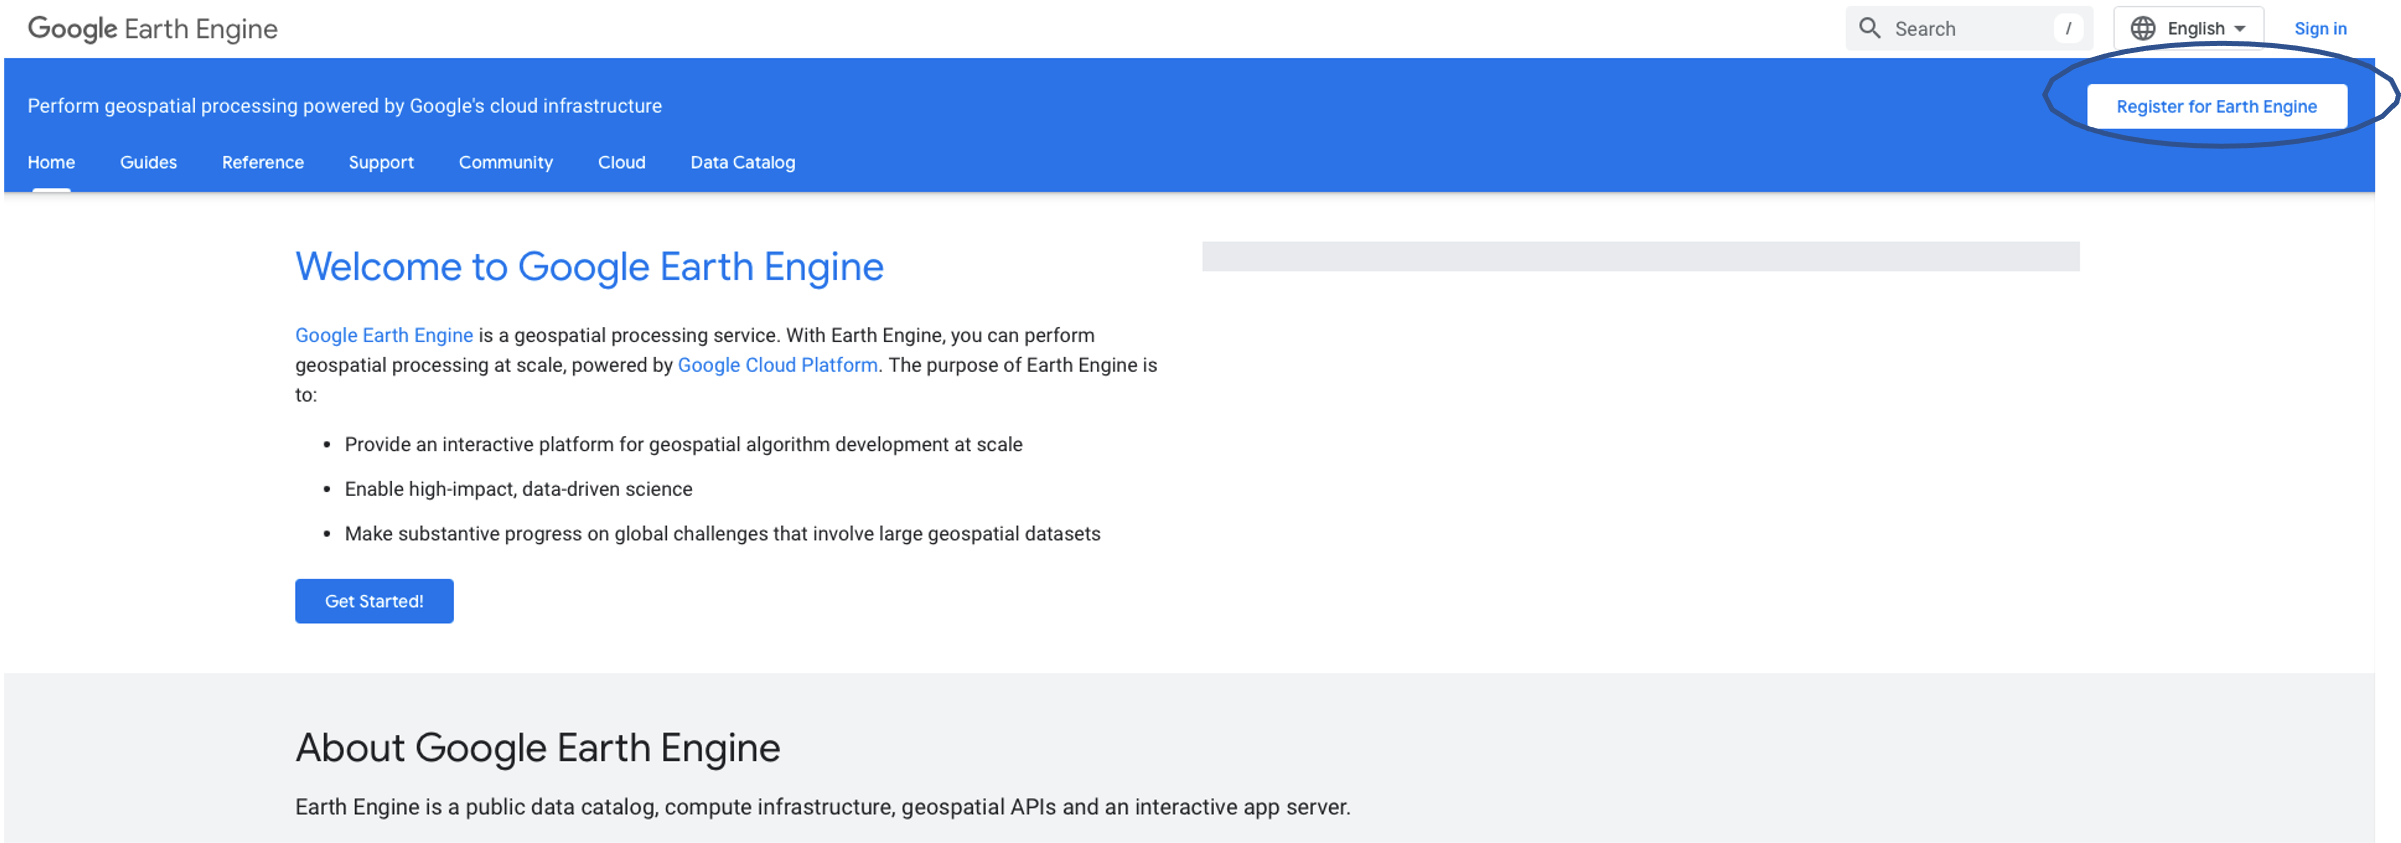
Click here to register the created google cloud project to use earth engine API and sign-in using the user ID used to create cloud project.
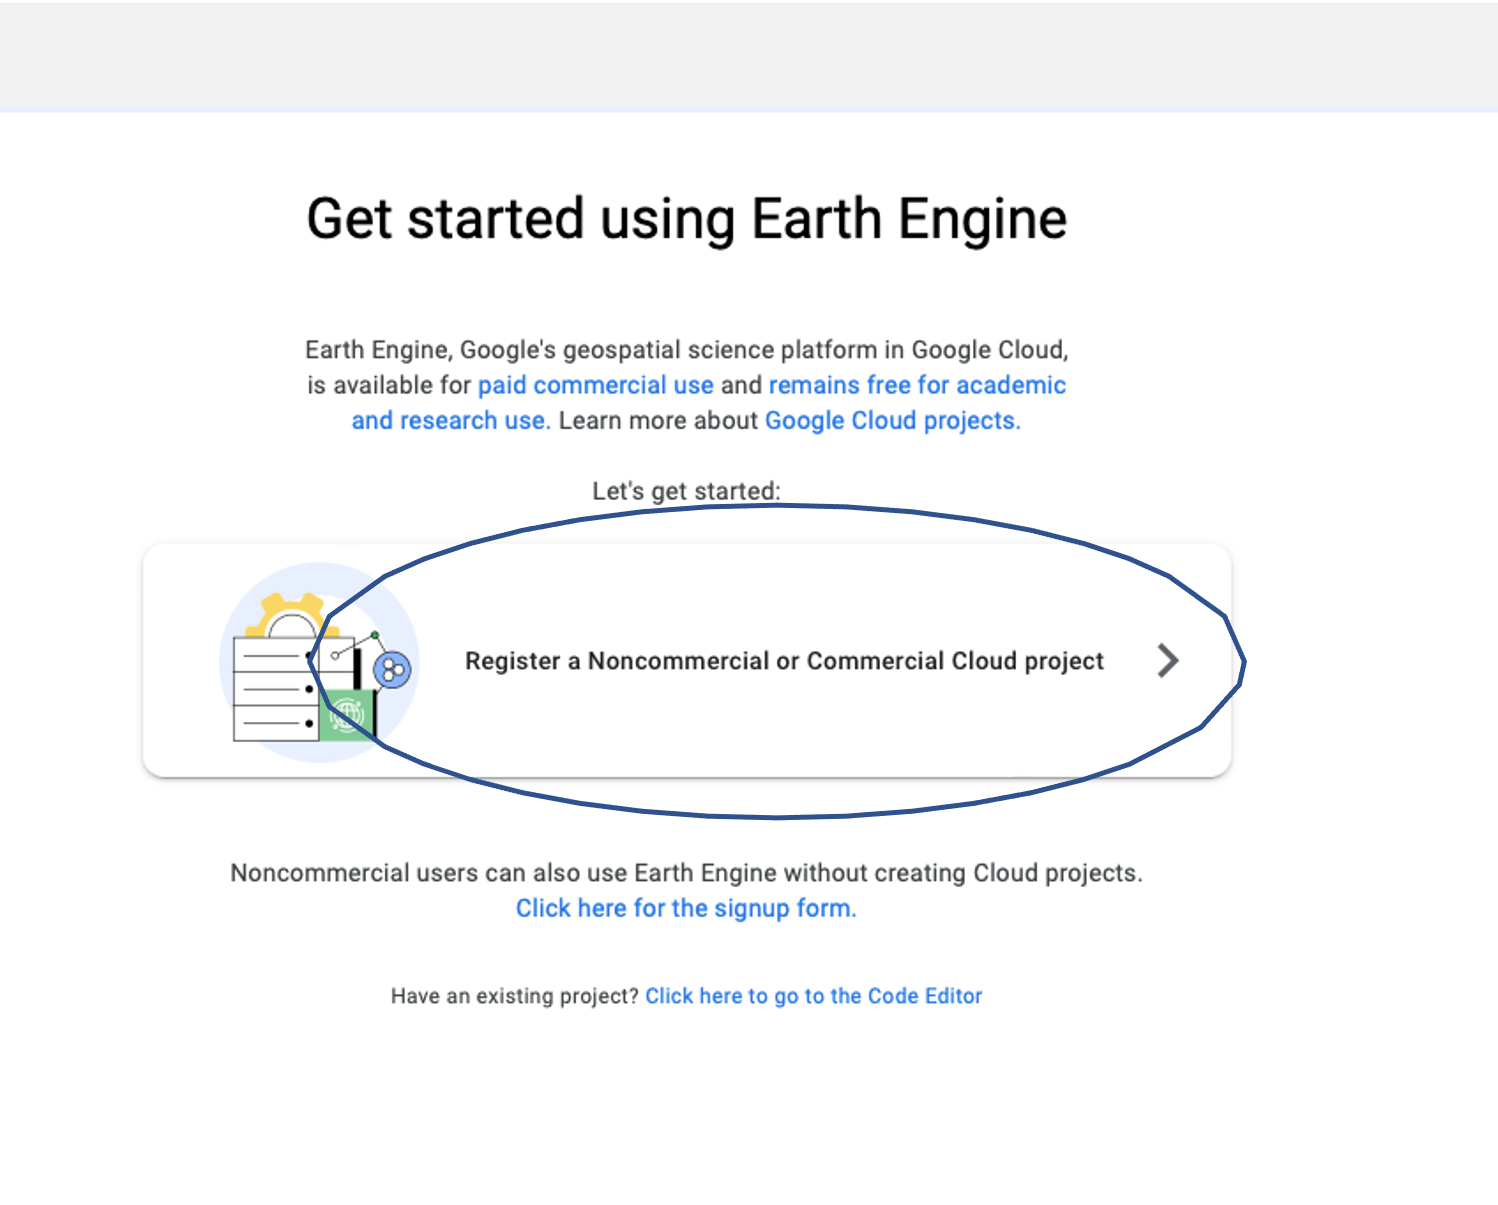
Step 2:
Click on ‘Register for Earth Engine’ (and select your email address if not signed in already). Then click on 'Register a Noncommercial or Commercial Cloud project'.
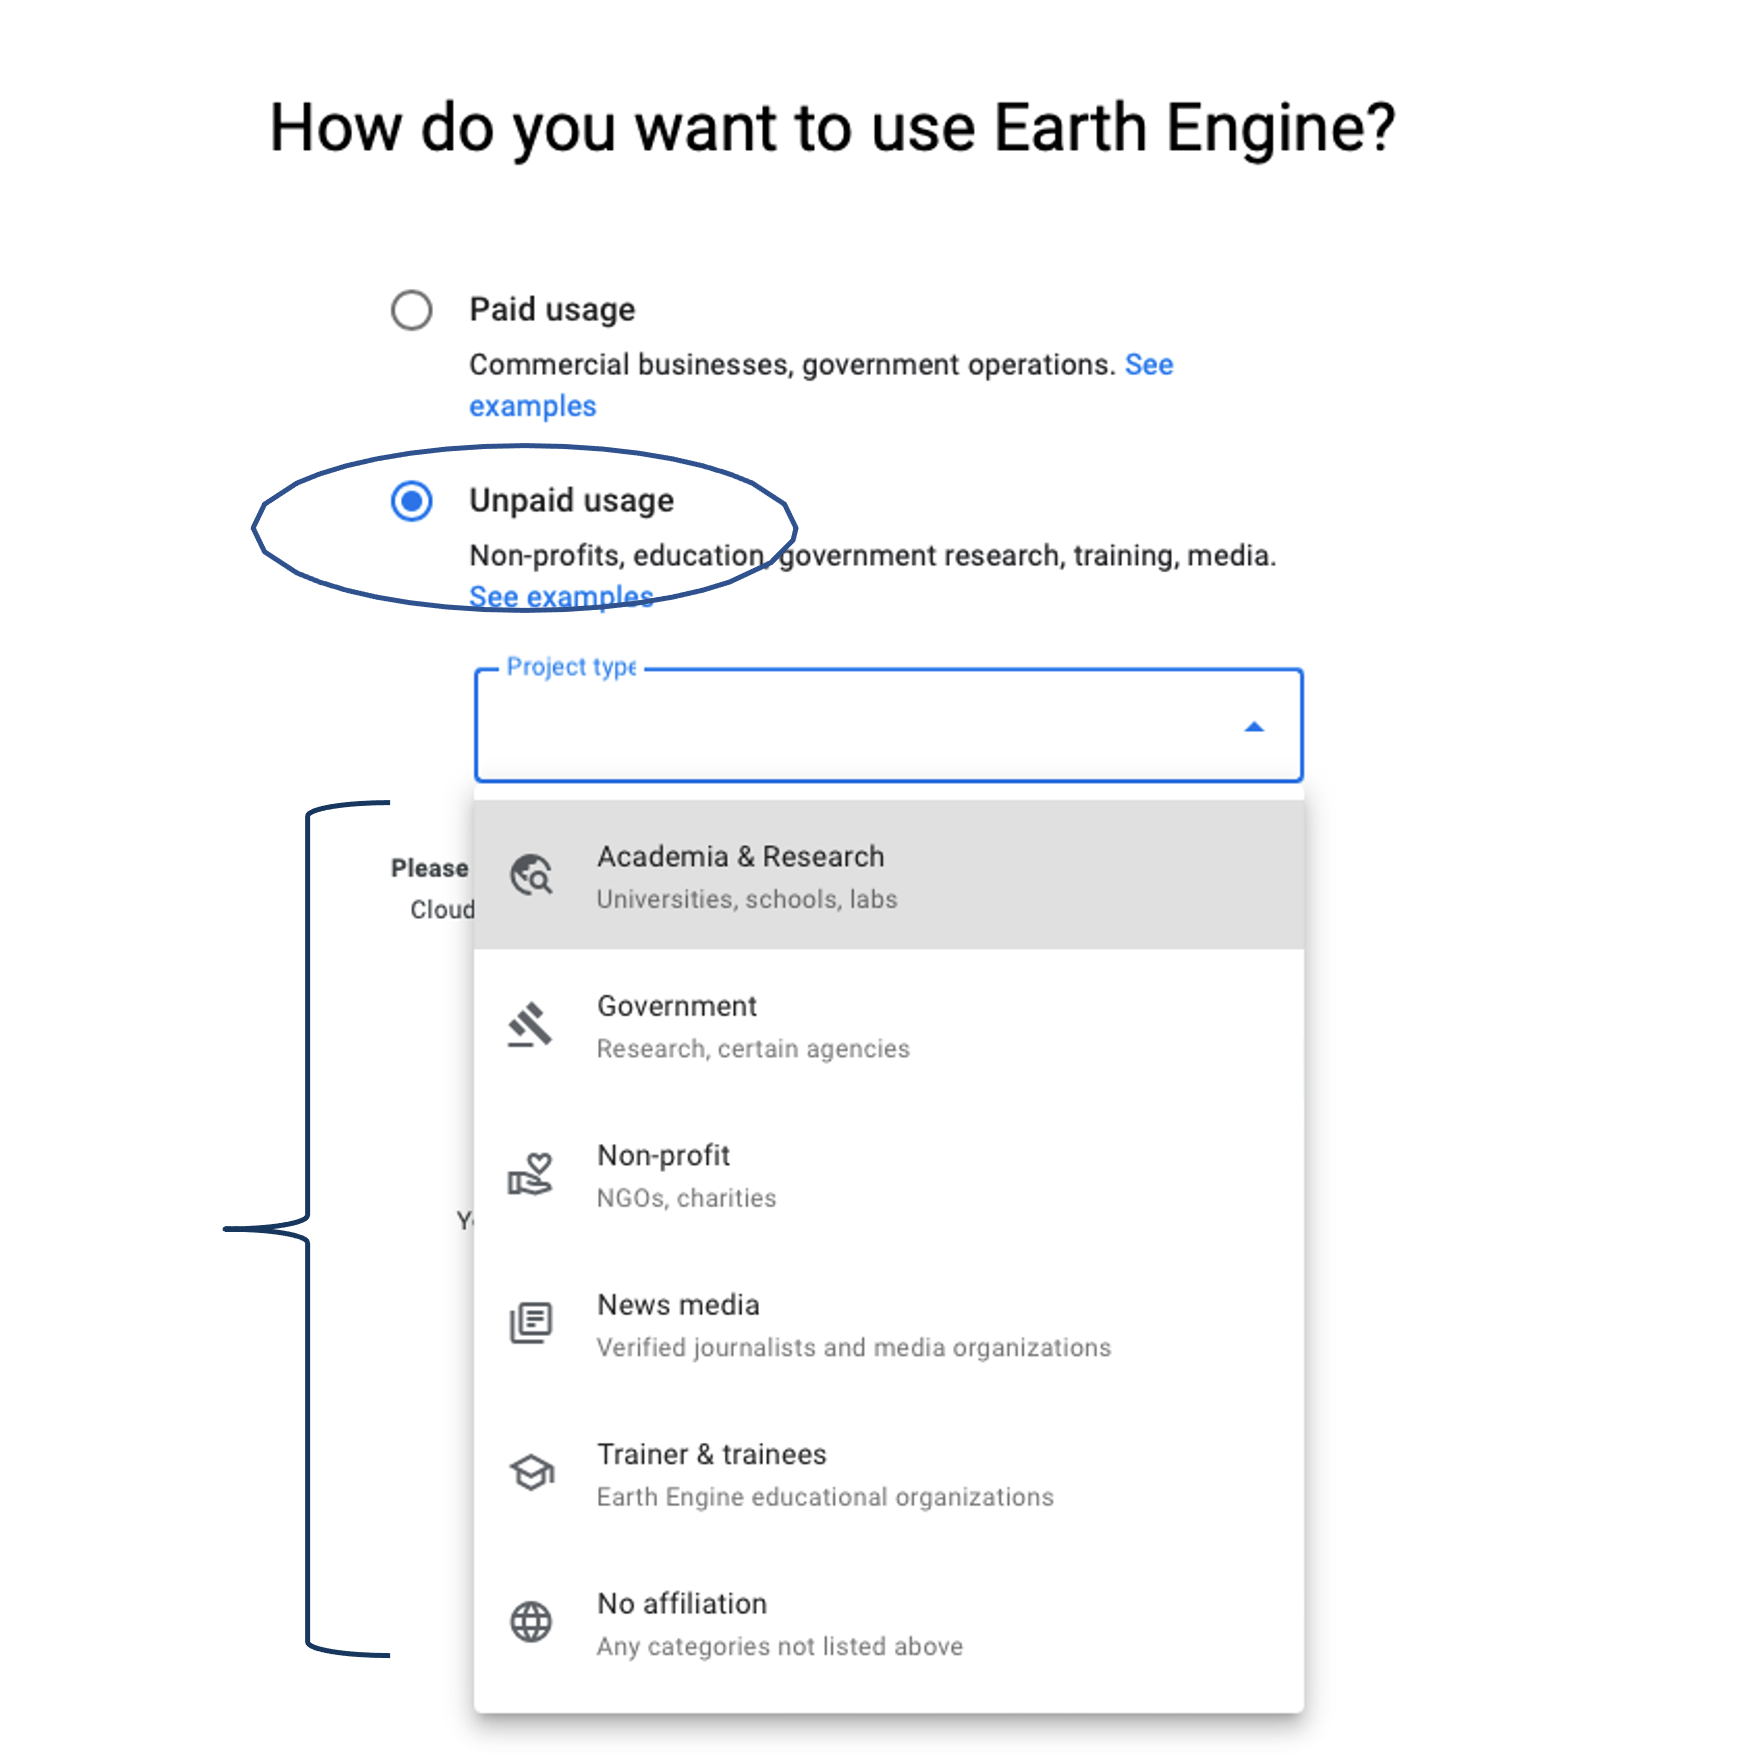
 Step 3:
Select “Unpaid usage” if using for non-commercial activity. Select a suitable ‘Project type’ and click on ‘NEXT’.
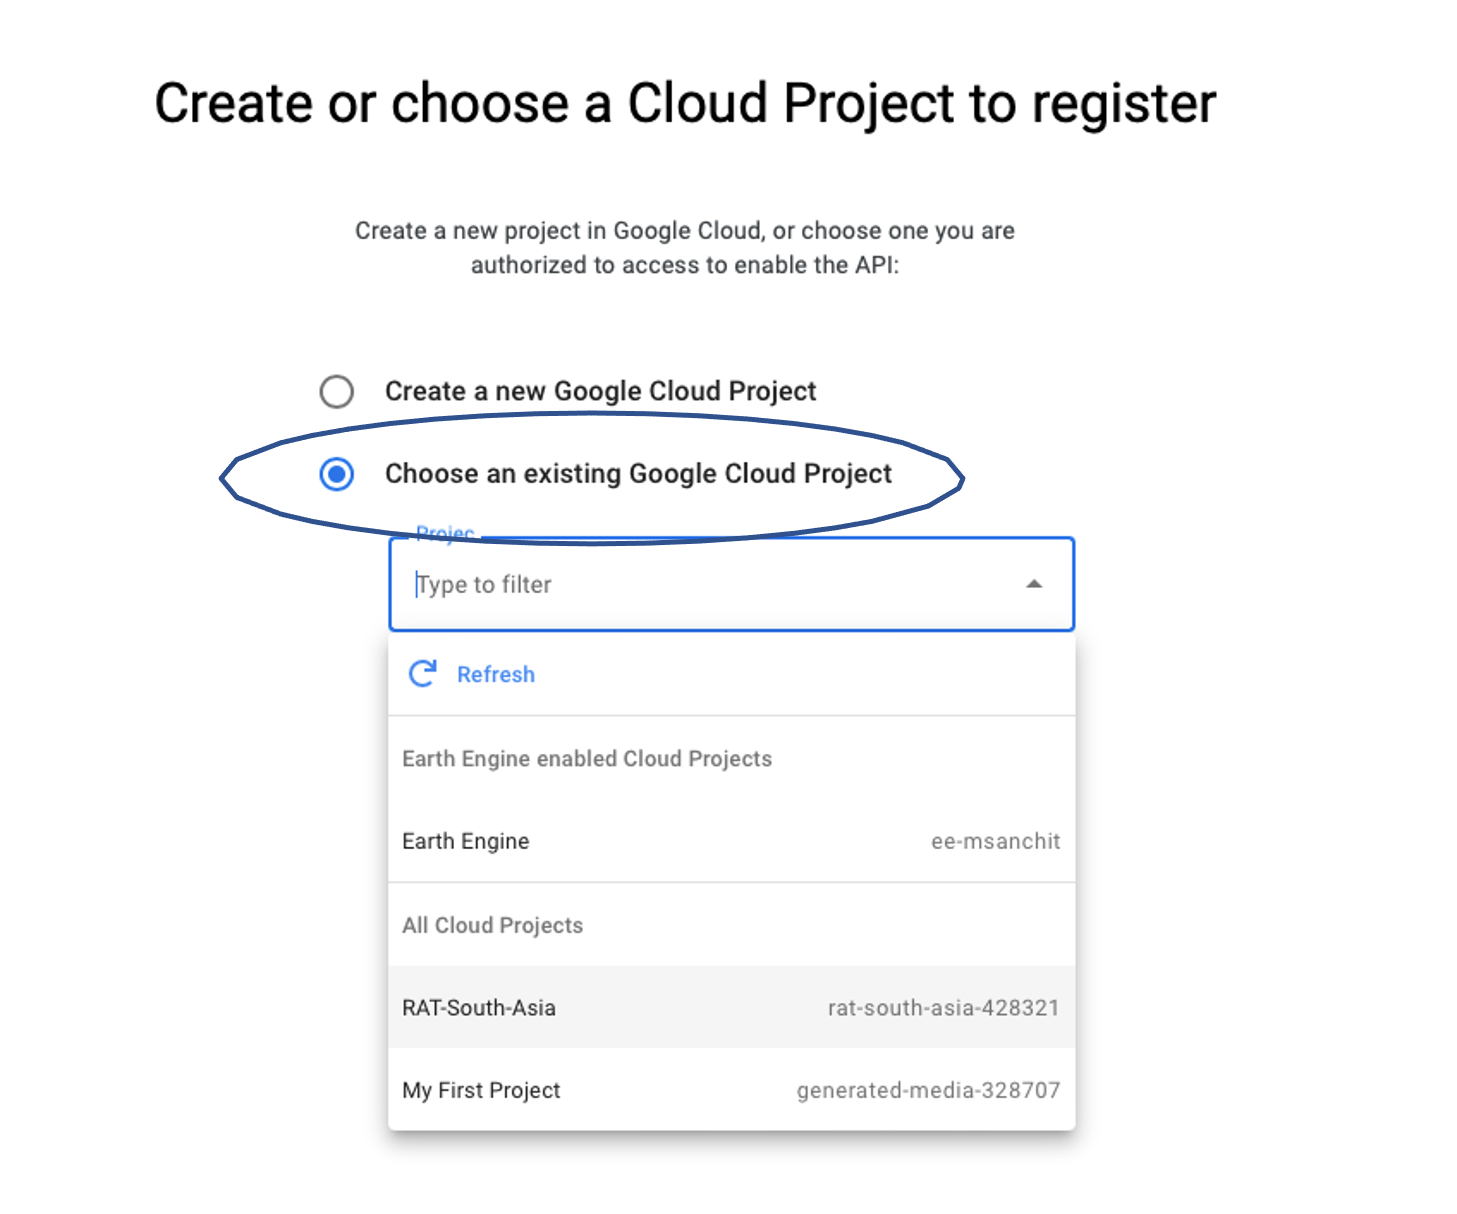
 Step 4:
Select “Choose an existing Google Cloud Project” and select the cloud project that you created in Task 1. Click on “Continue to Summary”.
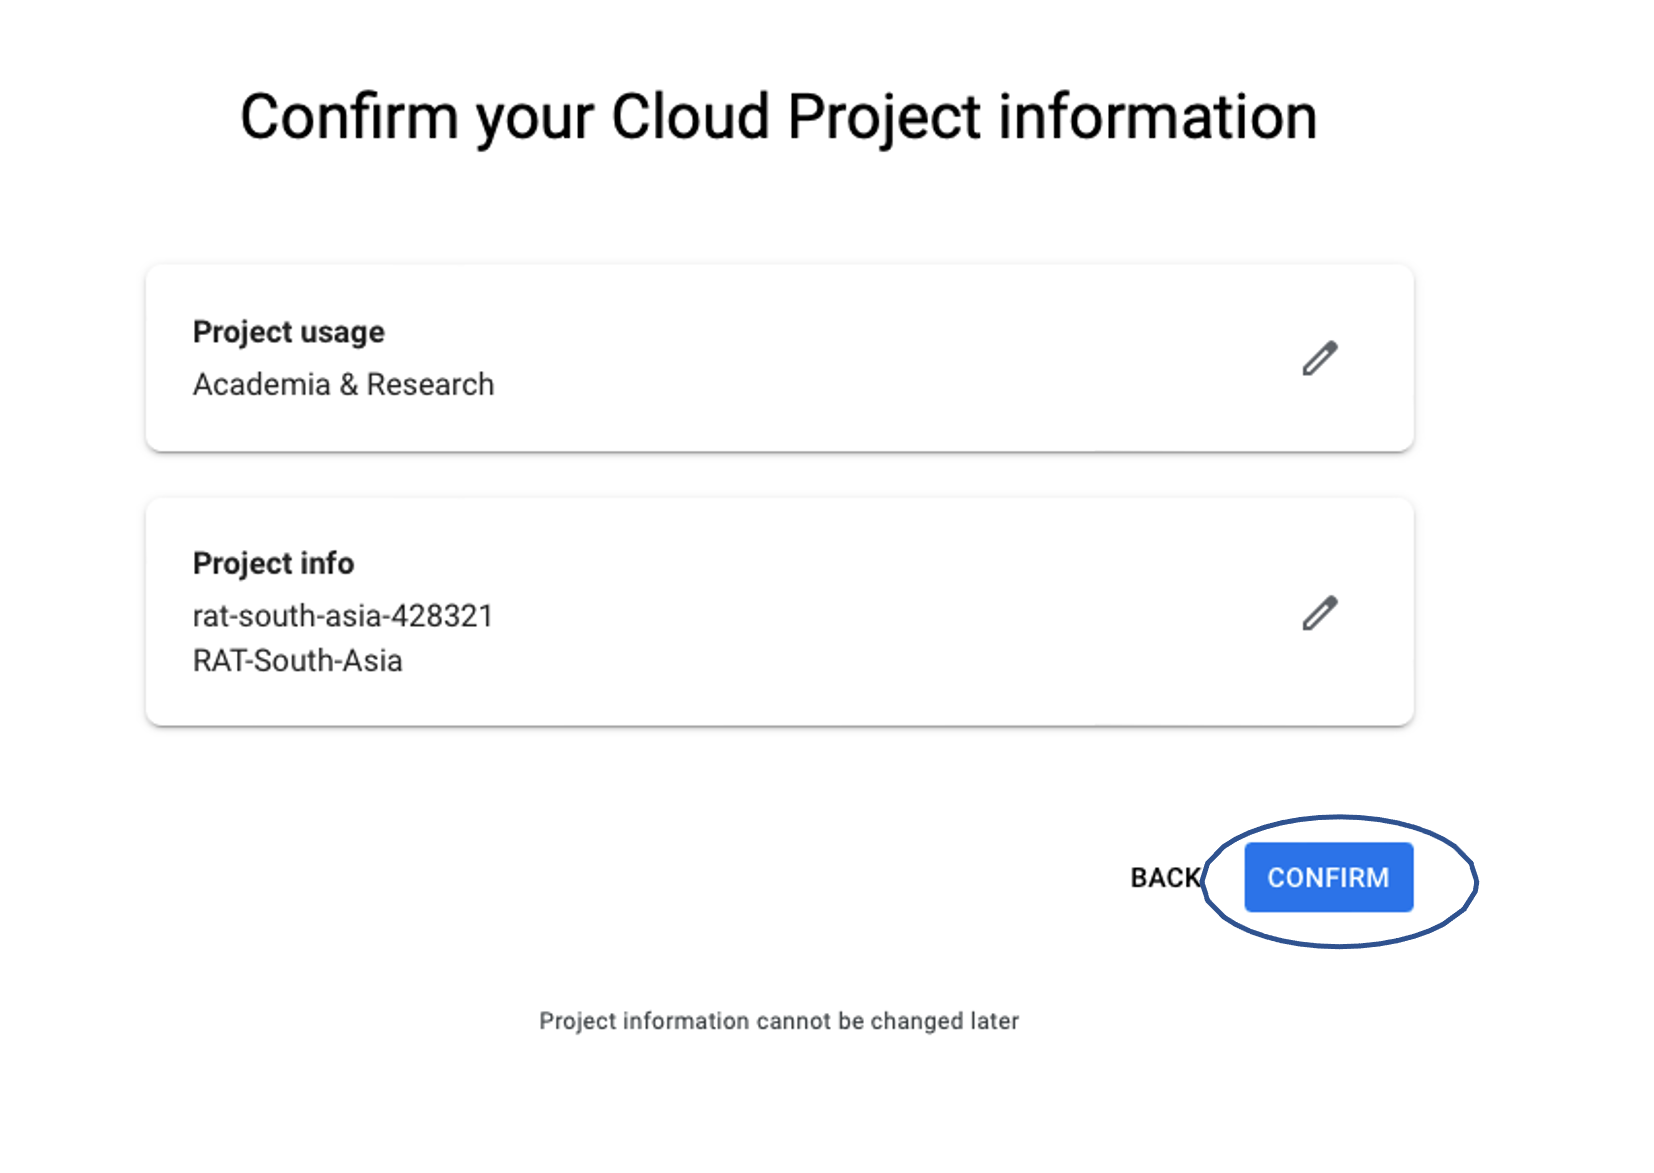
 Step 5:
Click on ‘Confirm’ and you can close the window.
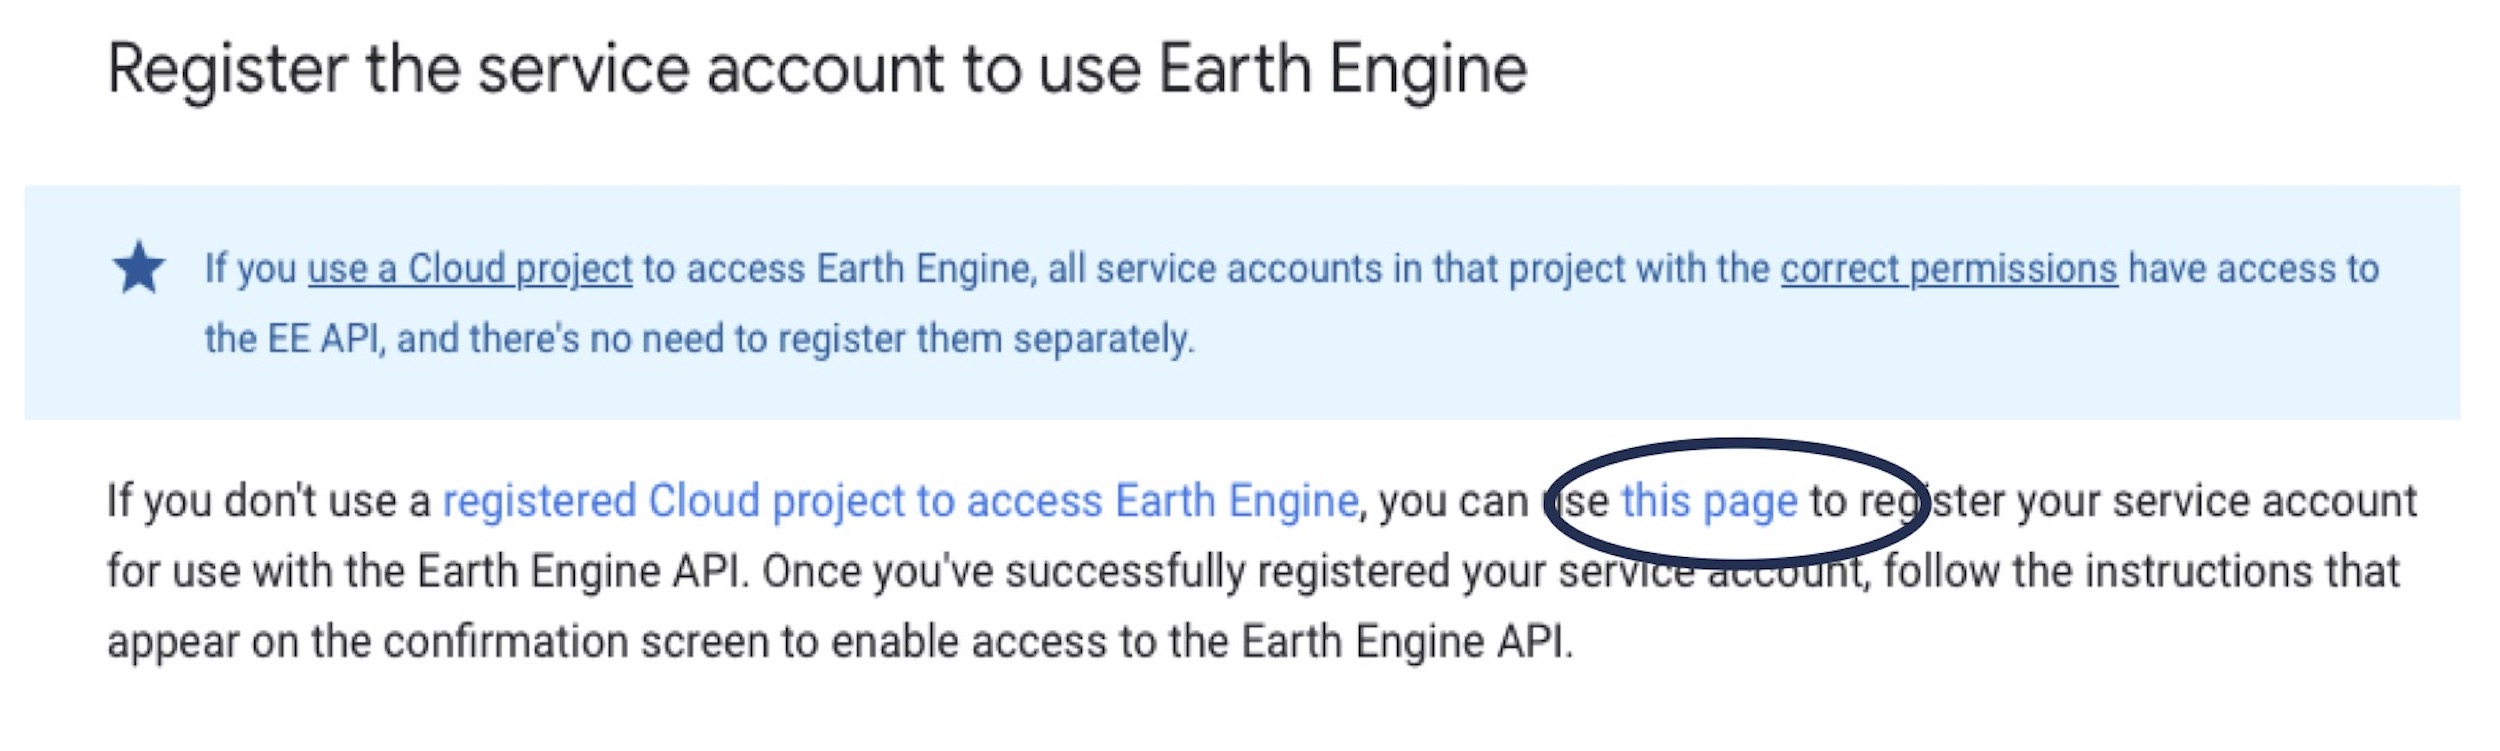
Task 4B (If Task 4A not done) : Register the service account to use Earth Engine.
Step 1:
Click here to register the service account created to use earth engine API.
Step 2:
Click on ‘this page’ and select your email address.
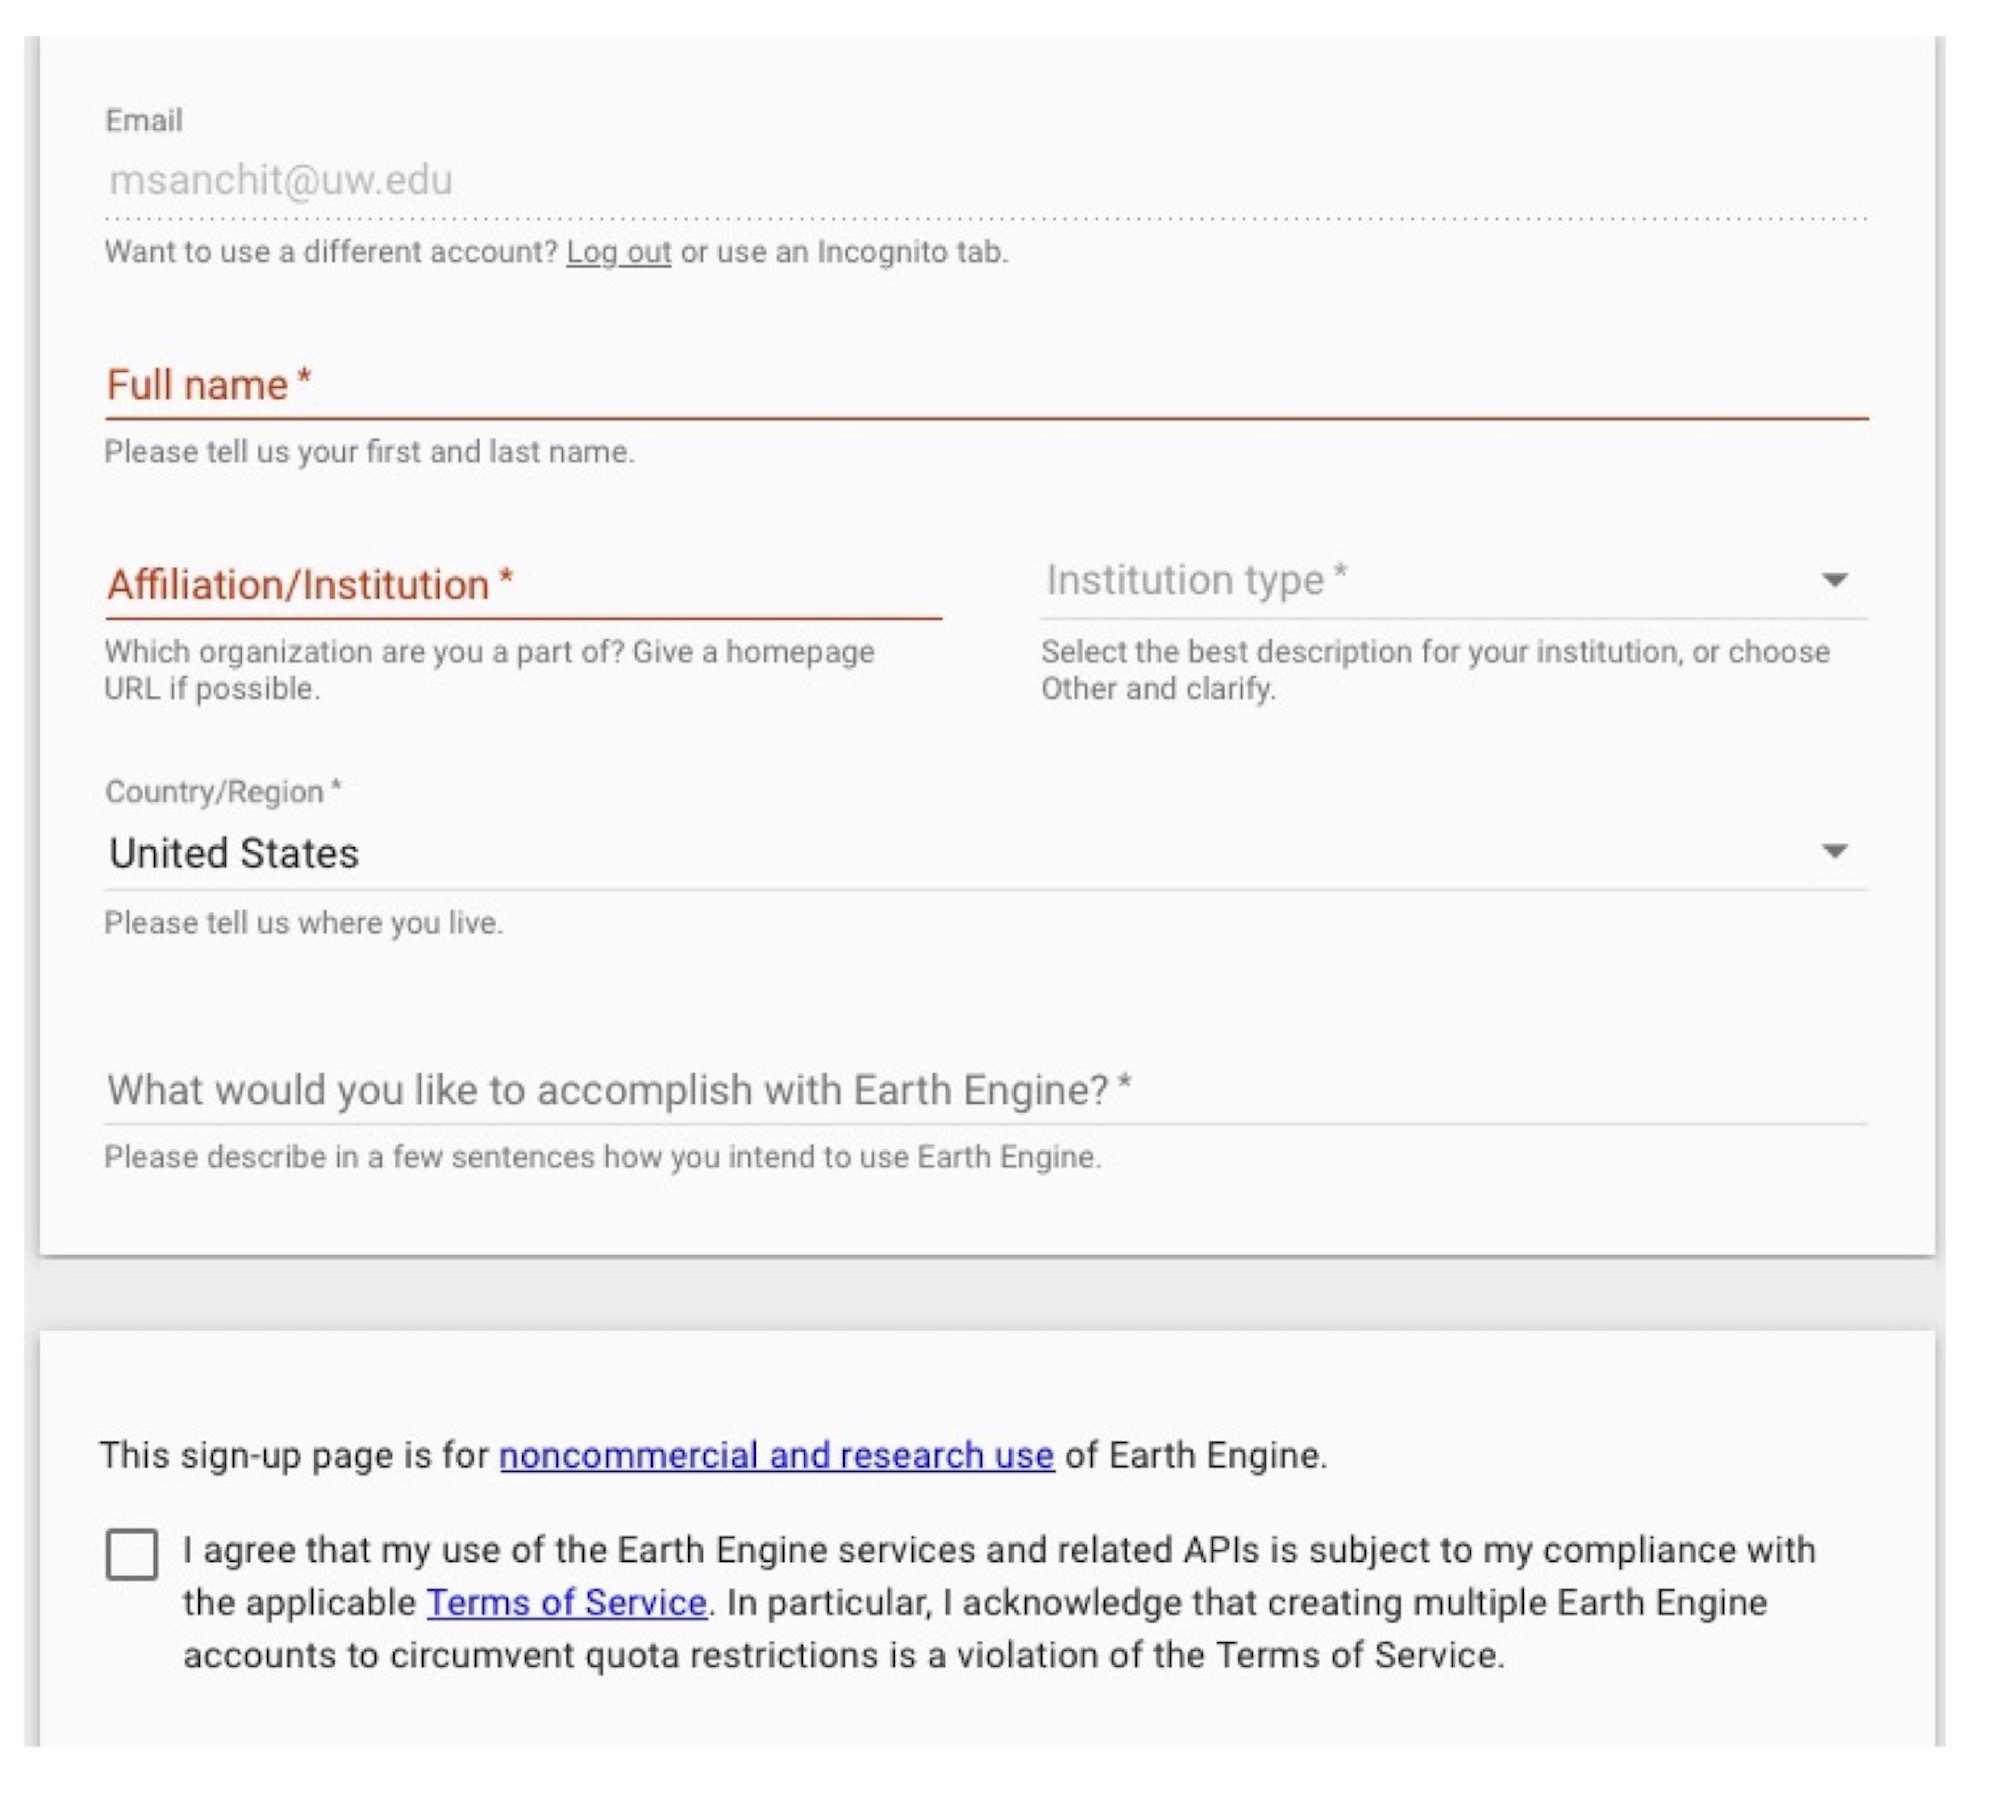
 Step 3:
Fill out the form and accept the terms.
 Step 4:
Click on submit.
Step 5:
Again click here and repeat step 2 by clicking on ‘this page’.
Step 6:
Enter the created service account’s email address.
Tip
Service account’s email address will look something like “foo-name@project-name.iam.gserviceaccount.com”
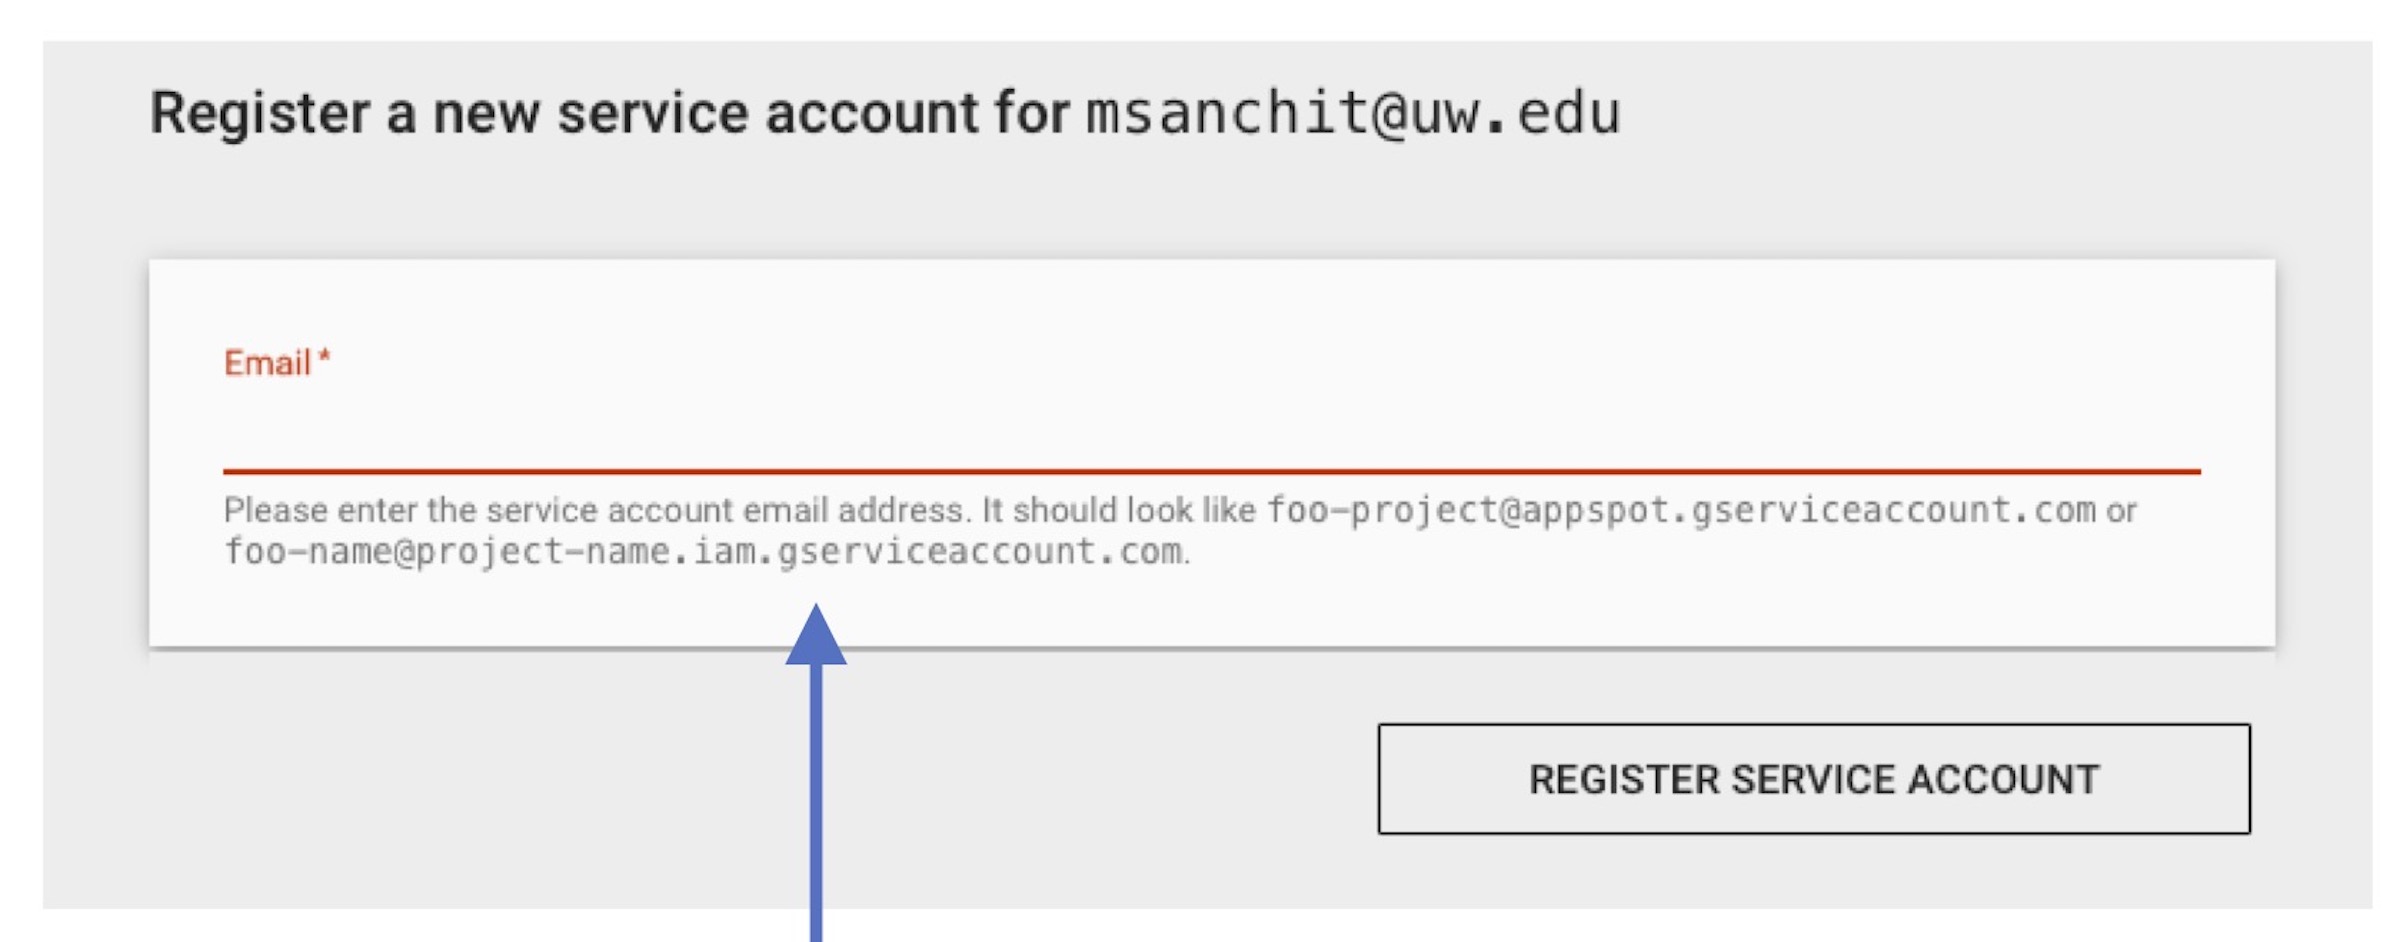 Step 7:
Click on ‘REGISTER SERVICE ACCOUNT’.
RAT Credentials
RAT 3.0 requires all the credentials created in the above sections in a single secret file. So, put all the credentials into a file named 'secrets.ini' by following the commands as mentioned here in secrets file section.